Welcome back again at part 4 of my Windows LAPS series! This is also my last part on this series 🙂
In this last part, I will show you how you can create a conditional access policy specifically for a Power App.
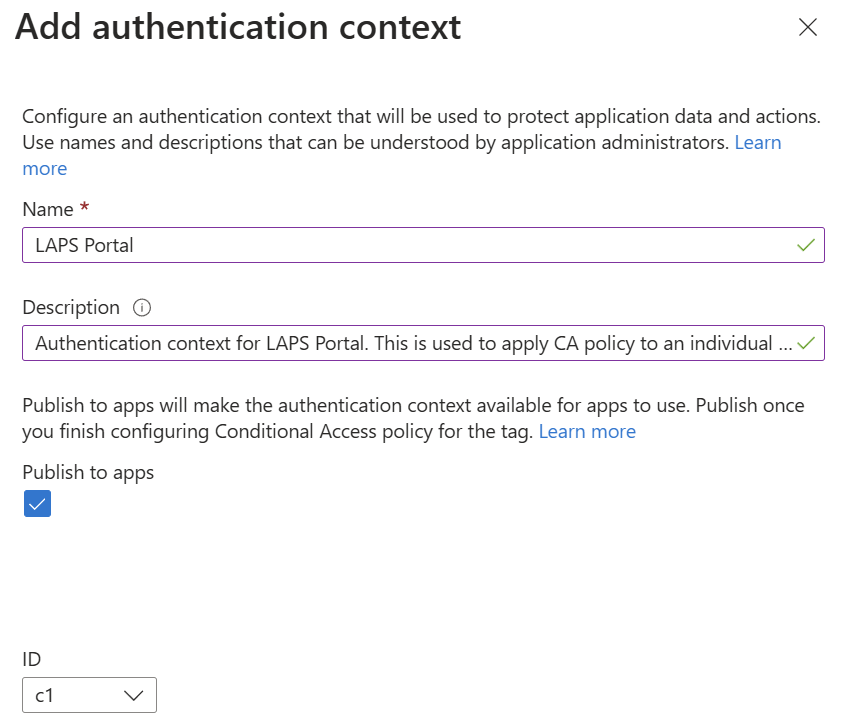
Go to Microsoft Entra admin center and look for “Protection” –> “Conditional Access”. Look for “Authentication contexts” and press “New authentication context”.
Give the authentication context a name and description. Also remember the ID of the authentication context. This is needed for later. Press “Save”.
In order to apply an authentication context / conditional access policy to a canvas application, you need to make use of PowerShell.
Open a new PowerShell as administrator and make sure you install the following PowerShell module:
- Install-Module -Name Microsoft.PowerApps.Administration.PowerShell
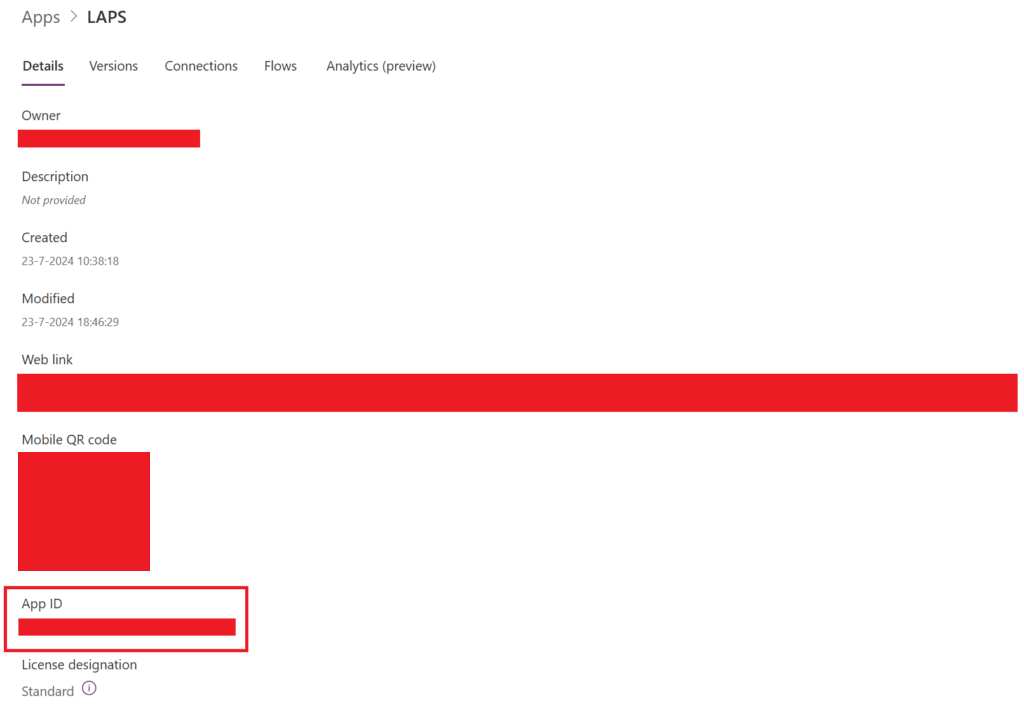
Wait until the PowerShell module is successfully installed. Now go back to Power Apps | Home –> Apps –> “LAPS” –> Details –> Details.
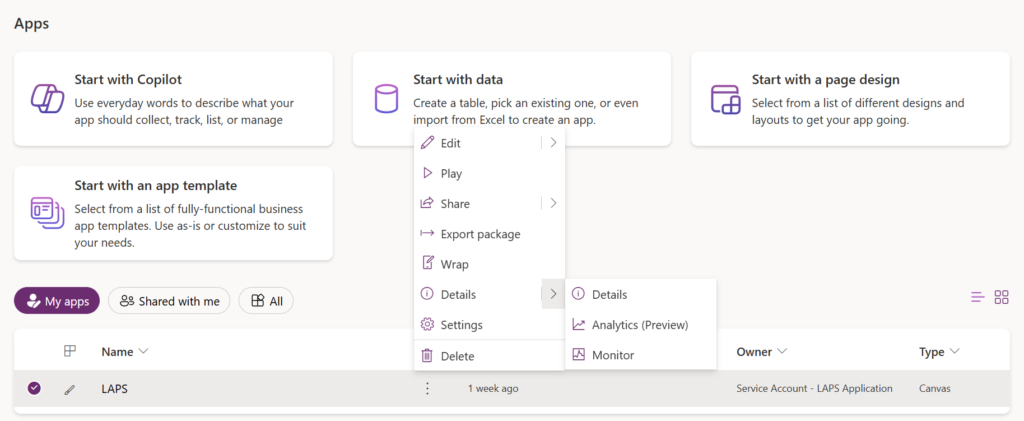
Now look for the App ID. Copy this to a notepad.
Next, you have to look for the “Environment name” by going to the gear wheel in the right upper corner and press “Session Details”. Look for the “Environment ID”. Copy this to a notepad.

Go back to PowerShell now and insert the command:
- Get-AdminPowerAppConditionalAccessAuthenticationContextIds -EnvironmentName {Insert Environment ID here} -AppName {Insert App ID here}
The output should be empty.

Now insert the below command:
- Set-AdminPowerAppConditionalAccessAuthenticationContextIds –EnvironmentName {Insert Environment ID here} -AppName {Insert App ID here} -AuthenticationContextIds {Insert Authentication Context ID here}
The Authentication context ID is the one you have created earlier whilst creating the actual authentication context. In my case this is C1.
If successful, you will receive a status 200 code. This means that your authentication context is successfully linked to your canvas application.

You can confirm this by running the Get-AdminPowerAppConditionalAccessAuthenticationContextIds -EnvironmentName {Insert Environment ID here} -AppName {Insert App ID here} command again.
The output should show the authentication context ID. In my case C1.

Go to Microsoft Entra admin center and open “Protection” –> “Conditional Access” –> “Policies”. Press “New Policy”.
We’re going to create one conditional access policy that blocks access if you’re not coming from a compliant and Entra ID joined device.
Conditional Access policy settings:
- Name: Block LAPS Canvas App
- Target Resources: Authentication Context – LAPS Portal
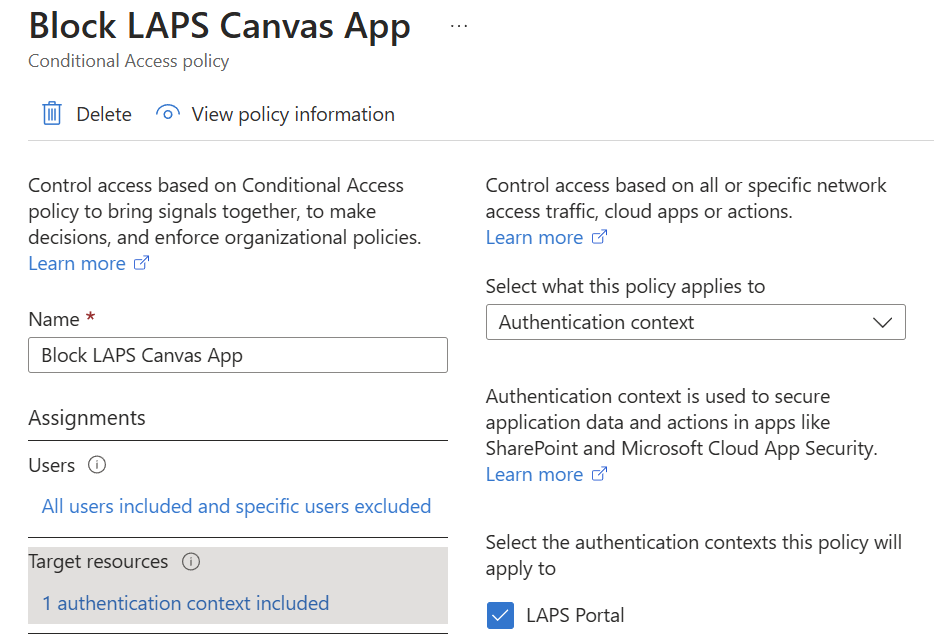
- Network: Include any network or location
- Device platforms: Any device
- User Risk: Medium
- Sign-in Risk: Medium
- Grant: Block access
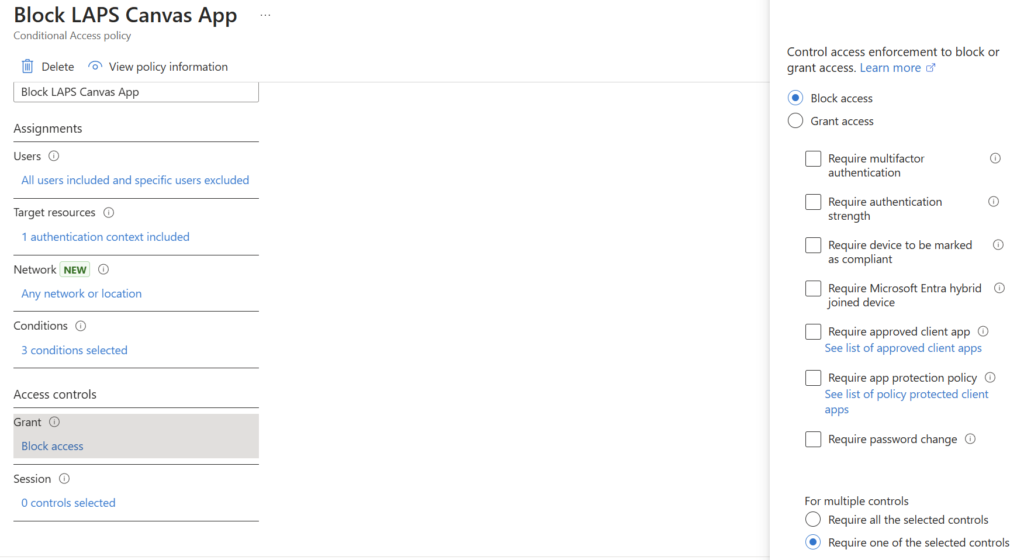
Save the policy and make sure you turn it on.
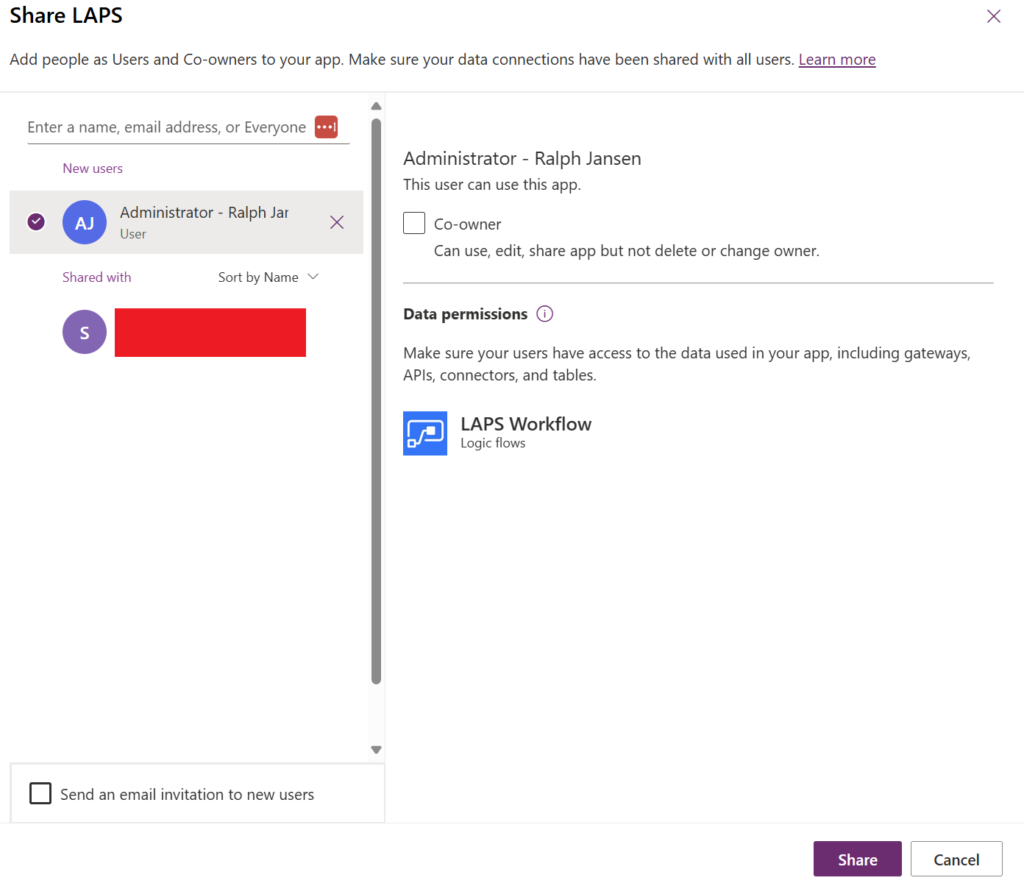
Go back to Power Apps | Home and open your canvas application. In the right upper corner look for the red circled icon and press on it.

Enter a description and press “Publish this version”.

Look for the red circled “Share” button and press on it.

A new page opens where you can provide access to the users that require access to the canvas application.
Enter a user or an Entra ID security group and press “Share”. The user(s) that have been added are able to access the canvas application now.
Now, let’s test the behavior and see if we are getting blocked by conditional access.
After entering the Power App, you get prompted for an additional sign in.

If you sign in you’re getting blocked by conditional access because you’re not coming from a compliant and Entra ID joined device.
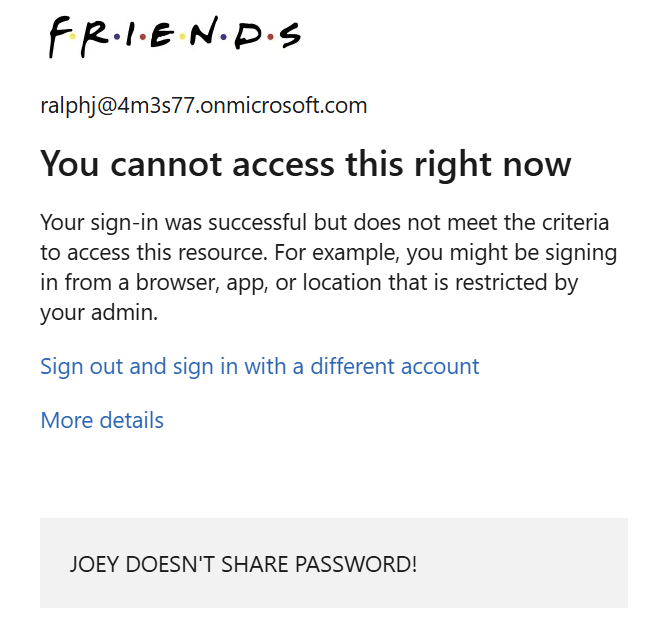
The canvas application displays an additional generic error message that the application couldn’t be started. Mission accomplished! 🙂

The sign-in logs in Entra ID show also a failure.

Detailed:

That’s it for now! 😀
See ya.