
Hello and welcome back! It has been a while since I have posted a blog on my website.
Today, I am going to show you how you can build an automation that automatically disables inactive Entra ID accounts in your tenant. I will make use of the following tools that are available within the Microsoft suite: Power Automate, SharePoint and Graph.
Please note that you require a Power Automate Premium license to run this workflow. The workflow is making use of a premium connector. The license costs are 20 dollar per user per month. The good thing is that you only require one license.
Requirements
- Microsoft Power Automate Premium license
- Microsoft Entra ID app registration
- Microsoft SharePoint Online list
- Microsoft Entra ID account
- Microsoft Graph
Application registration
First, we start with creating a new application registration in Entra ID. The application registration is needed to read and disable the inactive Entra ID accounts in our tenant.
- Go to Microsoft Entra admin center and sign in with your credentials
- Go to “Applications” –> “App registrations”
- Press “New registration”
- Give your application a name like “Disable Inactive Accounts App Registration”
- Configure the “Who can use this application or access this API?” for accounts in this organizational directory only
- Press “Register”
- Once the application is created, go to “API permissions”
- Press “Add a permission”
- Select “Microsoft Graph” –> “Application permissions”
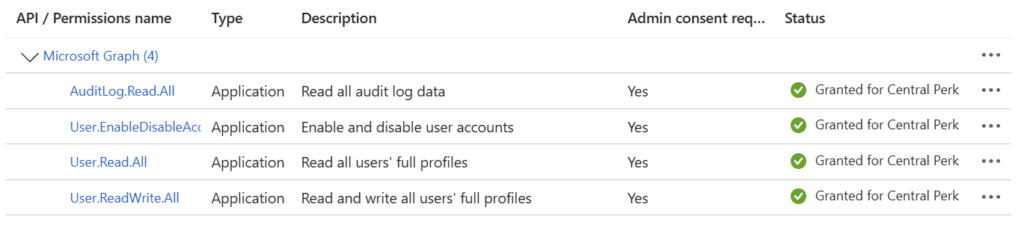
- Assign the following four permissions:
- AuditLog.Read.All
- User.Read.All
- User.ReadWrite.All
- User.EnableDisableAccount.All
- Press “Add permissions”
- Remove the “User.Read” permission
- Press “Grant admin consent”
Your application registration permissions should look like in the below screenshot.
Application secret
For development purposes to test the functionality of the Power App and Power Automate workflow, we can create a client secret to connect with the app registration. In production, you should avoid this and use a certificate instead. I will publish an article how you can use a certificate in near future.
- Go to Microsoft Entra admin center and sign in with your credentials
- Go to “Applications” –> “App registrations”
- Press “All applications”
- Look for the newly created app registration “Disable Inactive Accounts App Registration”
- Press “Certificate & secrets”
- Press “New client secret”
- Description: AccountsAutomation
- Expires: Recommended – 180 days (6 months)
- Copy the value and secret ID to somewhere safe. You need it later on
The secret is now generated and looks like below.

Service account creation
Now we have to create a manual service account in Entra ID. This service account will be used to host the Power App and to run the Power Automate workflow.
- Go to Microsoft Entra admin center and sign in with your credentials
- Go to “Users” –> “All users”
- Press “New user” –> “Create new user”
- User principal name: srv-accountsautomation
- Display name: Service Account – Disable Inactive Accounts
- Password: Create a password or auto generate one (Save this as you require it later)
- Press “Next: Properties”
- Make sure you set the usage location. Otherwise, you cannot assign a license to the account
- Press “Next: Assingments”
- Don’t add anything here
- Press “Next: Review and create”
- Press “Create”
The account has been created. Now, we need to assign the license.
The Power Automate workflow we are going to create later in this article requires a premium connector. This connector can only be used whilst having a Microsoft Power Automate Premium license.
Next to this license, I am also assigning the licenses in the below screenshot.
Please note that you have to assign licenses now through Home – Microsoft 365 admin center instead of the Entra ID portal.

SharePoint Online List
- Go to SharePoint – Microsoft 365 admin center
- Press “SharePoint”
- Press “Active sites”
- Press “Create”
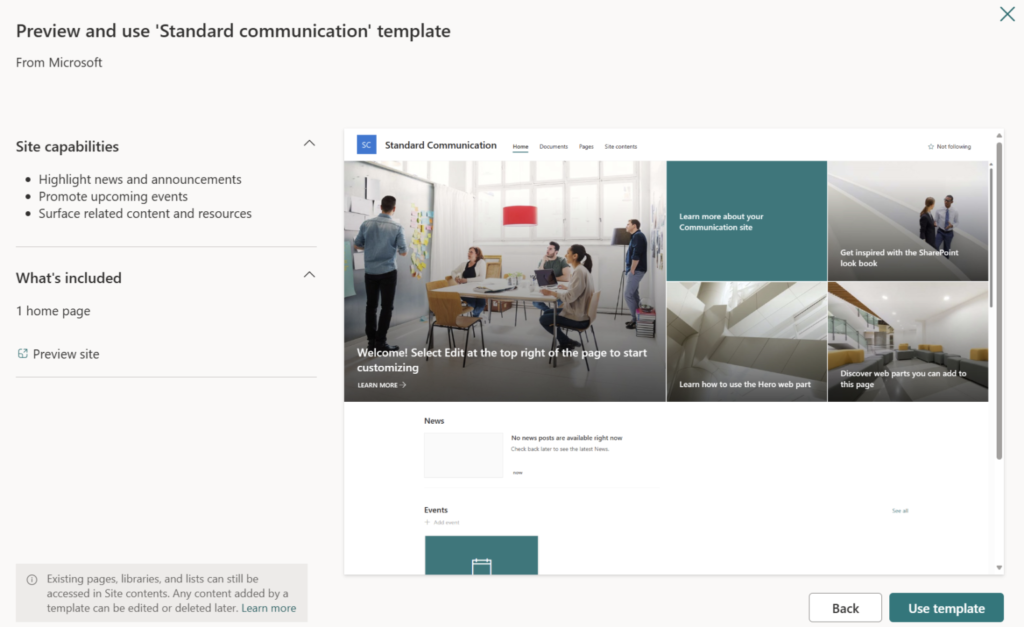
- Select “Communication site”
- Select the template “standard communication”
- Press “Use template”
Fill in the details that are required to create a new site. Also, you have to specify an owner. I would recommend to use the service account, we have created before.
Press “Next”.
Select the language and timezone and press “Create site”. The site is now created and ready for use.
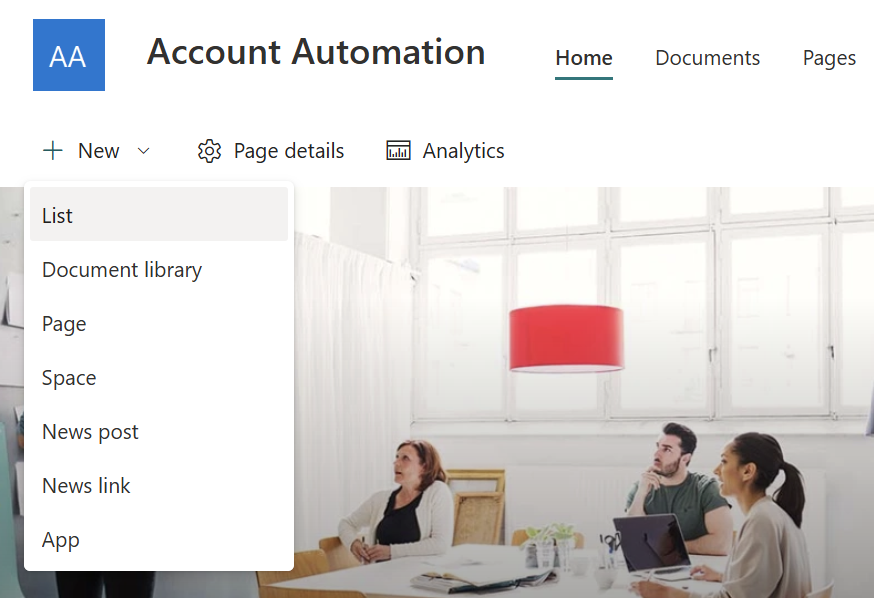
Go to the newly created SharePoint Online site and press “New” –> “List”. Select “Blank list”.
Give your list a name and description.
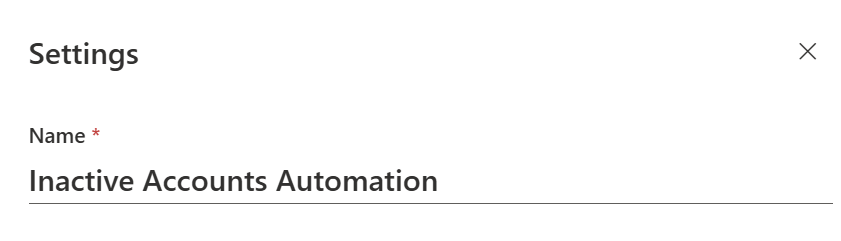
Press “Create”. Your list is now created and ready for use.
Press the arrow next to “Title” –> “Column settings” –> “Rename”. Rename it to “DisplayName”.
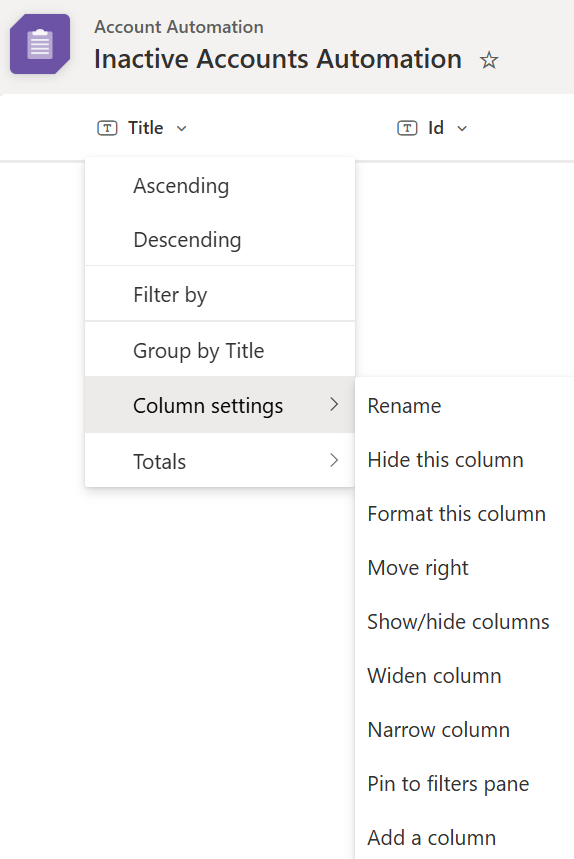
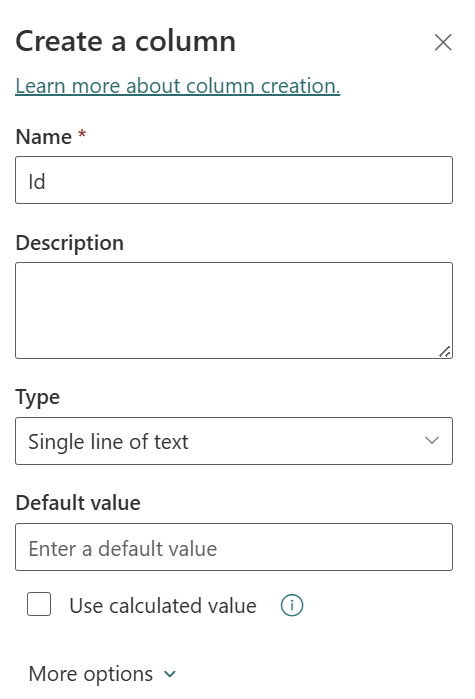
Press “Add column” –> “Text”. The column name is “Id”. Press “Save”.
Repeat the same steps for a column named “UserPrincipalName”, “Department”, “AccountEnabled”, “OtherMails” and “UserType”.
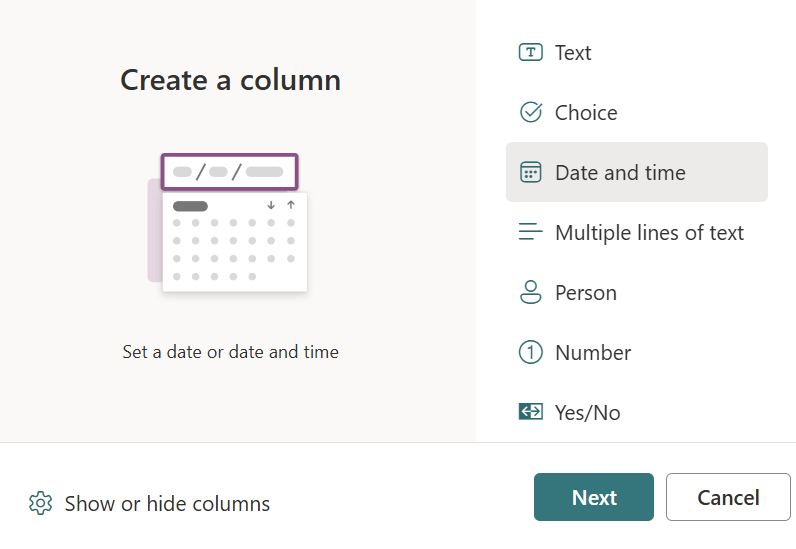
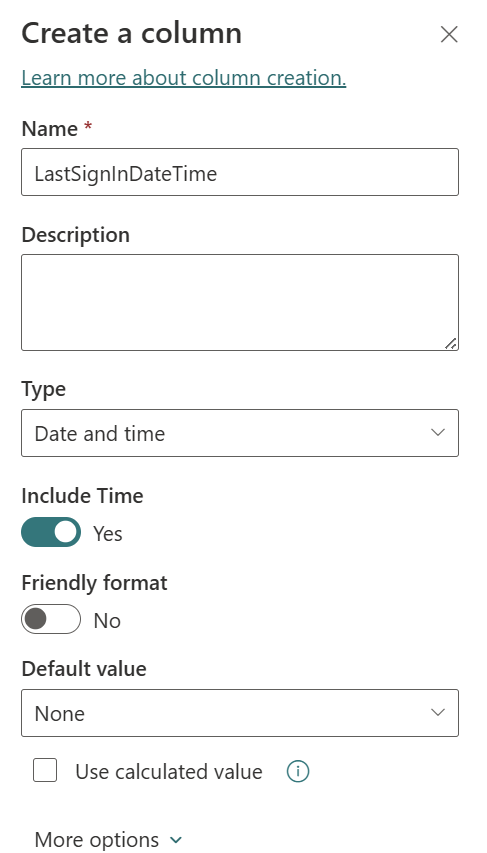
Now add one more column named “LastSignInDateTime”. Select “Date and time”.
Select “Include time”.
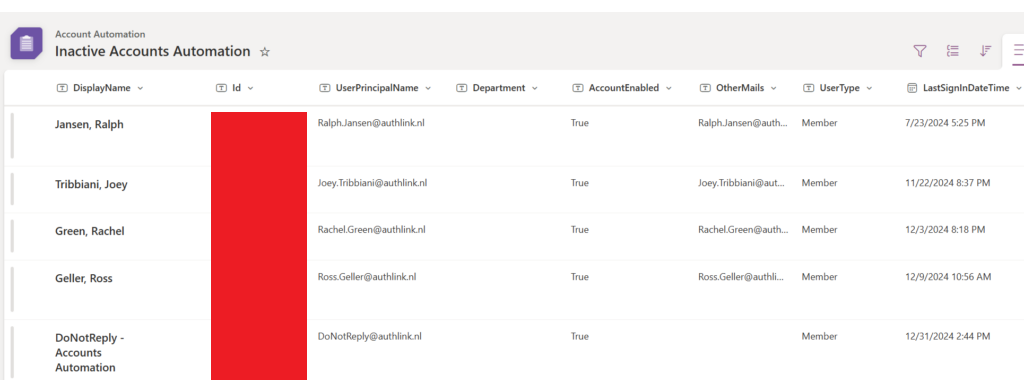
Your list should look like in below screenshot.

Power Automate
- Go to Microsoft Power Automate | Home and press “Create” in the menu on the left
- Press “Scheduled cloud flow”
- Fill in the flow name, when the flow runs, how often the flow runs and at which day
- Press “Create”
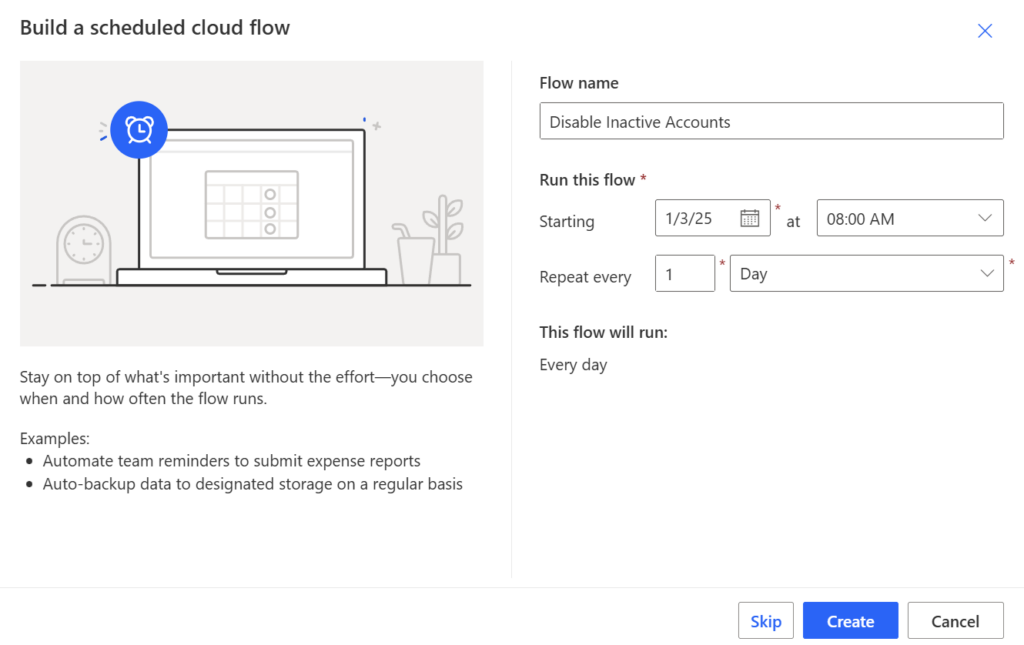
Your flow has been created now.
HTTP connector
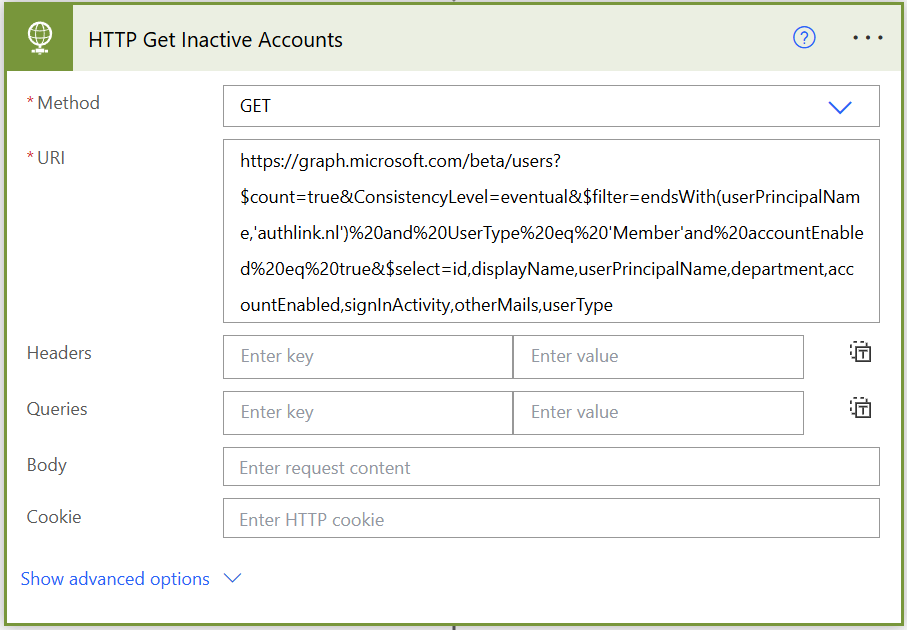
Press “New step” to add an action. We need the “HTTP” connector which is a premium connector. Therefore, as I mentioned earlier, you require a Power Automate Premium license.
Settings:
- Method: GET
- URI:
- Filter for UserType = Member and AccountEnabled = True:
https://graph.microsoft.com/beta/users?$count=true&$filter=UserType%20eq%20'Member'and%20accountEnabled%20eq%20true&$select=id,displayName,userPrincipalName,department,accountEnabled,signInActivity,otherMails,userType,createdDateTime,usageLocation
- Filter for UserType = Guest and AccountEnabled = True
https://graph.microsoft.com/beta/users?$count=true&$filter=UserType%20eq%20'Guest'and%20accountEnabled%20eq%20true&$select=id,displayName,userPrincipalName,department,accountEnabled,signInActivity,otherMails,userType,createdDateTime,usageLocation
- Filter for UserType = Member, AccountEnabled = True and UserPrincipalName = EndsWith “authlink.nl”
https://graph.microsoft.com/beta/users?$count=true&ConsistencyLevel=eventual&$filter=endsWith(userPrincipalName,'authlink.nl')%20and%20UserType%20eq%20'Member'and%20accountEnabled%20eq%20true&$select=id,displayName,userPrincipalName,department,accountEnabled,signInActivity,otherMails,userType,createdDateTime,usageLocation
- Filter for UserType = Member, AccountEnabled = True and DisplayName = startsWith “Admin”
https://graph.microsoft.com/beta/users?$count=true&ConsistencyLevel=eventual&$filter=startsWith(displayName,'Admin')%20and%20UserType%20eq%20'Member'and%20accountEnabled%20eq%20true&$select=id,displayName,userPrincipalName,department,accountEnabled,signInActivity,otherMails,userType,createdDateTime,usageLocation
- Filter for UserType = Member and AccountEnabled = True:
- Authentication: Active Directory OAuth
- Authority: https://login.microsoft.com
- Tenant: Enter your tenant ID. This can be found in the overview of Entra ID
- Audience: https://graph.microsoft.com
- Client ID: Enter the application (client ID) of the app registration. This can be found in the overview of the app registration
- Credential type: Secret
- Secret: Enter the value of the client secret you created earlier
This will retrieve all enabled member accounts with a user principal name that ends with “authlink.nl” in Entra ID.
Select “New step” and look for “Apply to each” function.
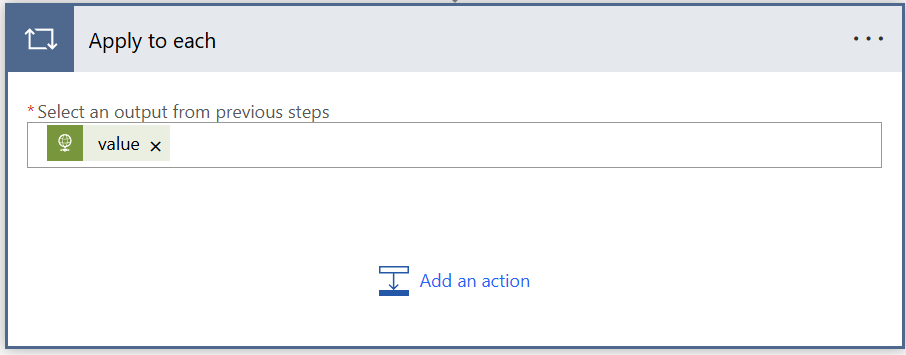
Select an output and choose for expression. Add the below code into the expression:
- body(‘HTTP_Get_Inactive_Accounts’)?[‘value’]
Inside the “Apply to each” function, select “Add a new action” and look for “Compose” in Data Operation. Select the “Inputs” and choose for expression again. Use the following code:
- items(‘Apply_to_each’)?[‘signInActivity’]
Rename the “Compose” action to SignInActivity.
Add another “Compose” action below and use the following code:
- outputs(‘SignInActivity’)?[‘lastSignInDateTime’]
Rename the “Compose” action to LastSignInDateTime.
Add another “Compose” action below and use the following code:
- items(‘Apply_to_each’)?[‘otherMails’]
Rename the “Compose” action to OtherMails.
Press “Add another action” and look for “Join” in Data Operation.
Select “Outputs” from the dynamic content and make sure it is the one from “OtherMails”.
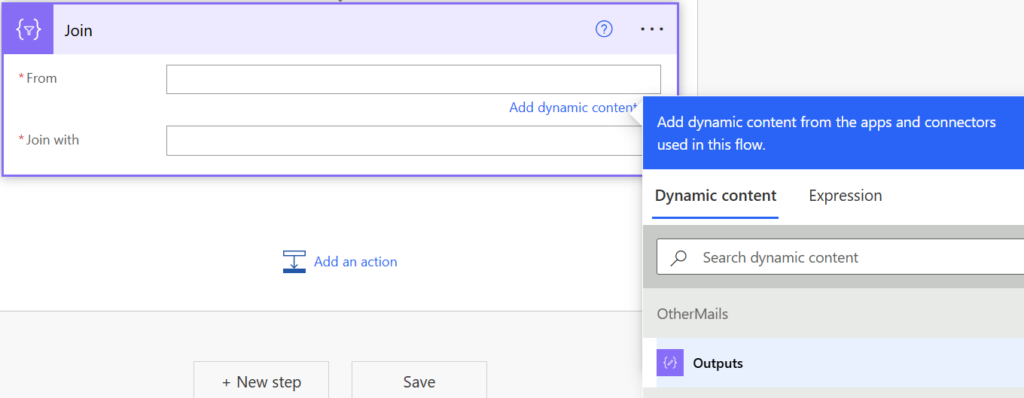
In the “Join With” field use a white space only.
This action is required because the output from Graph API will show brackets around the attribute. Later on, we will use an action to send an e-mail to the user to inform that their account has been disabled due to inactivity. If we don’t remove the brackets, the e-mail cannot be sent as the e-mail does not exists.
You can see the difference in the below screenshot.
Please note that the OtherMails attribute is only populated automatically for Guest accounts. For any other account, you have to manually set the OtherMails attribute. This attribute will be used to send the e-mail to the owner of the account that has been disabled.
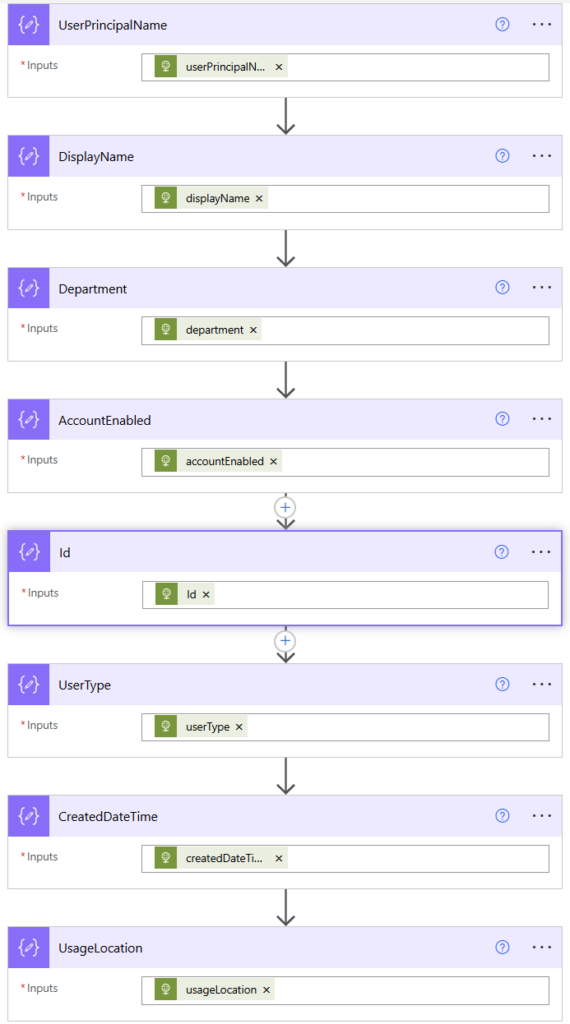
Repeat the same “Compose” action steps for UserPrincipalName, DisplayName, Department, AccountEnbaled, Id, userType, createdDateTime and usageLocation.
Once completed, your workflow should look like in the below screenshot.
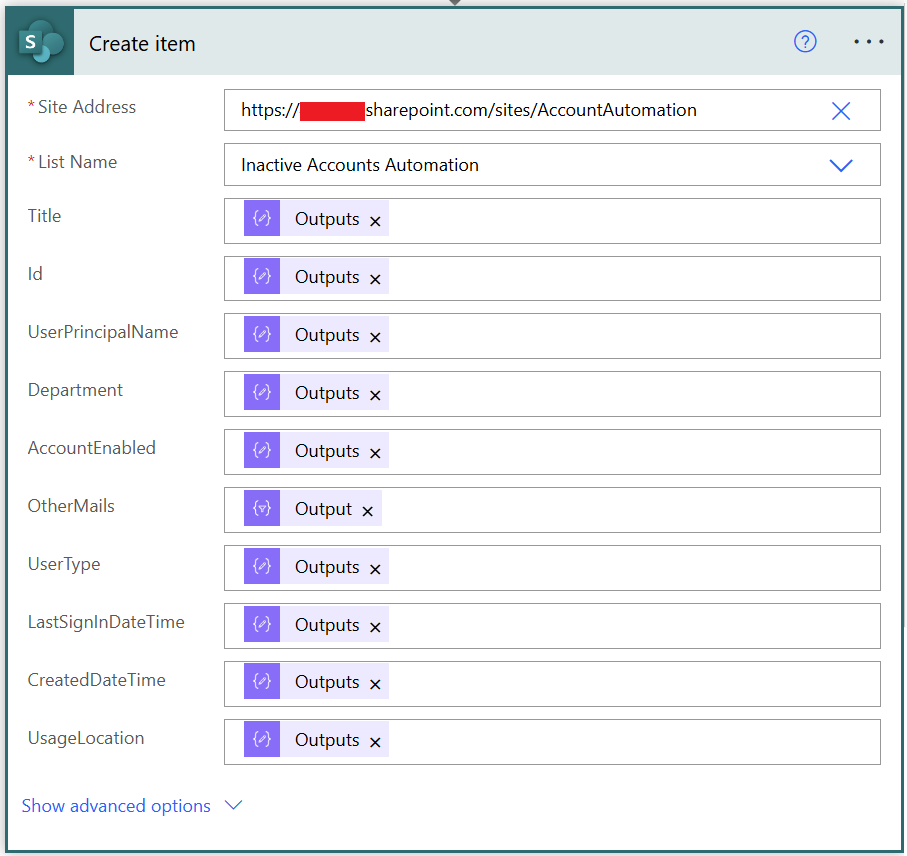
Inside the “Apply to each” press “Add another action” and look for “Create item” in SharePoint.
Enter the site URL of your SharePoint site and select the previously created list from the drop down menu.
Please note that the “Title” column is actually your “DisplayName” column in your SharePoint list. Somehow, the Power Automate workflow is unable to pick up this change.
Select the “Compose” outputs for each field and for OtherMails use the “Join” output.
Now press “New step” and look for “Convert time zone” in Date and Time.
The time needs to be converted into another format. Otherwise, we’re unable to make comparison between the last sign in date and today’s date.
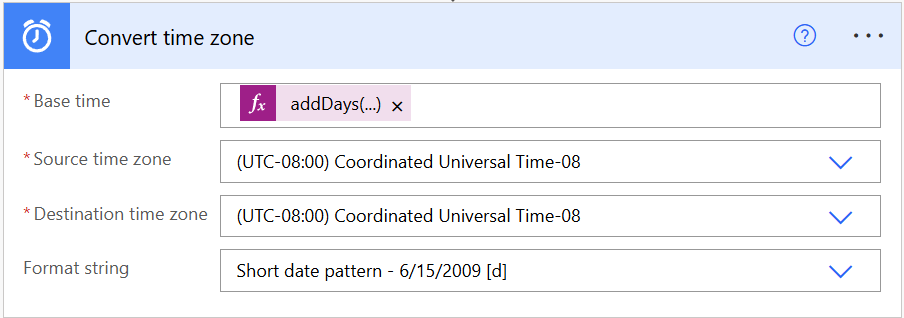
Add an expression in Base Time:
- addDays(utcNow(),-30)
This expression checks if the last sign in date is 30 days ago.
The default time zone is always Coordinated Universal Time-08. We don’t want to change this. Leave it. The format string we choose is “Short date pattern”.
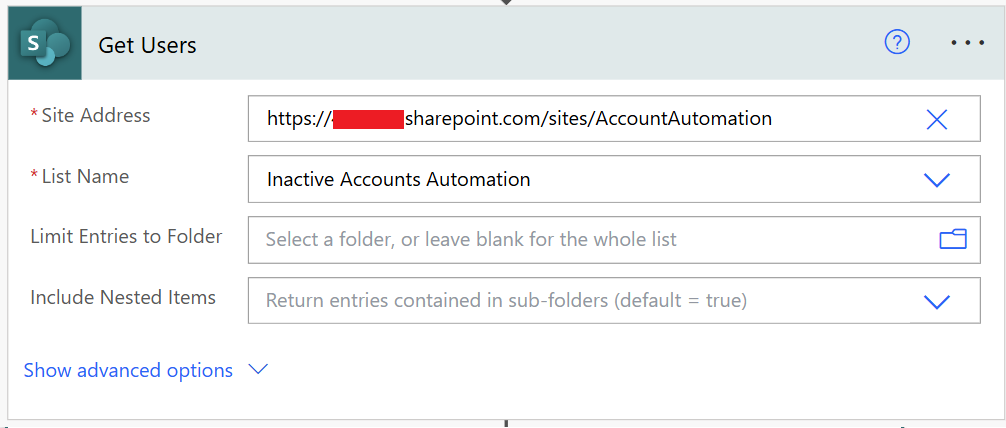
Add a “New step” and look for “Get Items” in SharePoint. Rename the action to “Get Users”.
Select the SharePoint site and list again. That’s it!
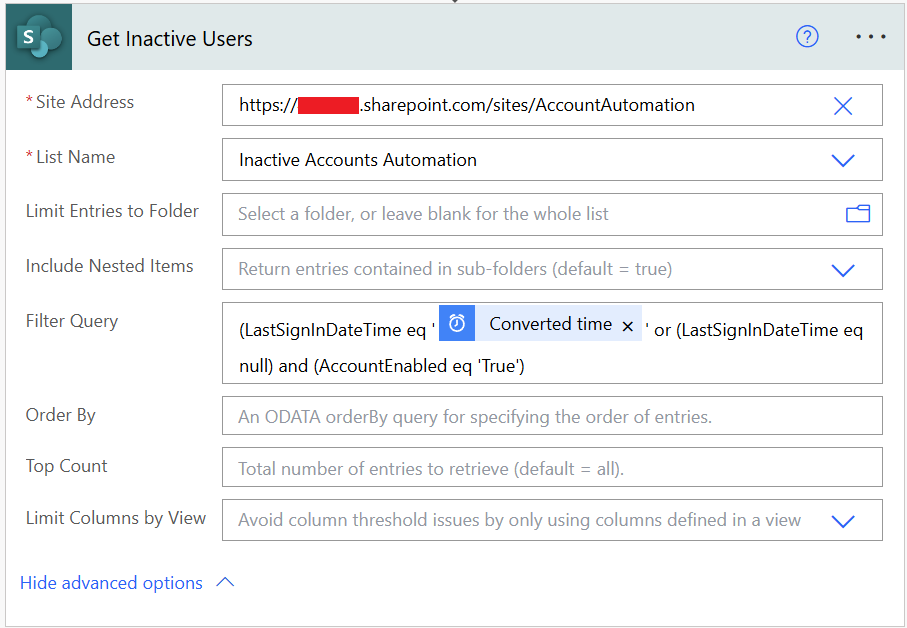
Add a “New step” and look for “Get Items” in SharePoint again. Rename the action to “Get Inactive Users”. Select the SharePoint site and list again.
Filter Query:
- (LastSignInDateTime le ‘@{body(‘Convert_time_zone’)}’ or (LastSignInDateTime eq null) and (AccountEnabled eq ‘True’)
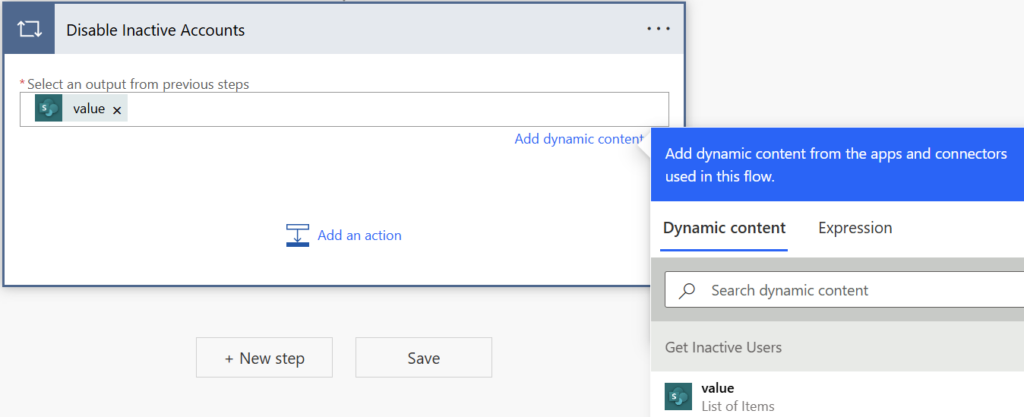
Press “New step” and look for another “Apply to each” action. Rename the action to “Disable Inactive Accounts”.
Select “value” from the dynamic content.
Press “Add an action”. Look for the HTTP connector. Rename it to “HTTP Disable Inactive Accounts”.
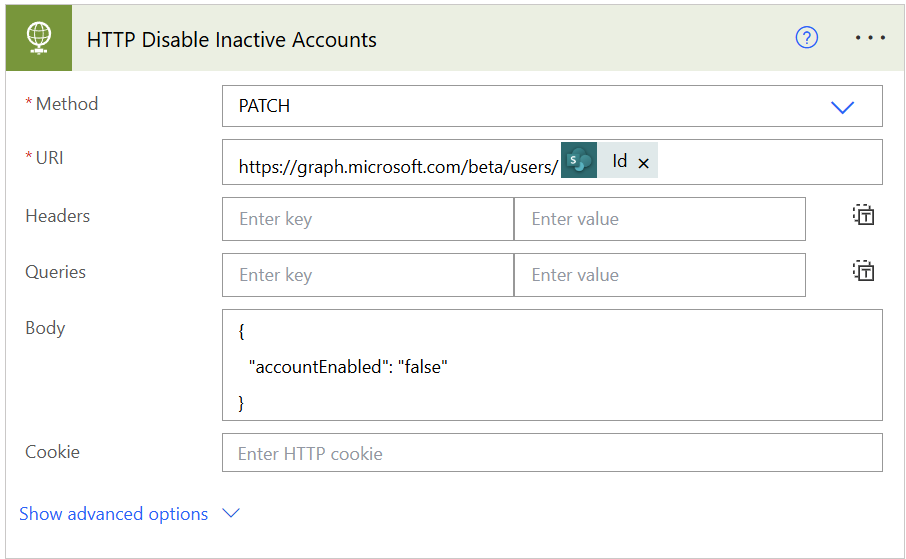
- Method: GET
- URI:
https://graph.microsoft.com/beta/users/@{items('Disable_Inactive_Accounts')?['Id0']}
- Body:
- { “accountEnabled”: “false” }
Add another “HTTP connector” and rename it to “HTTP Revoke MFA Session”.
- Method: GET
- URI:
https://graph.microsoft.com/beta/users/@{items('Disable_Inactive_Accounts')?['Id0']}/revokeSignInSessions
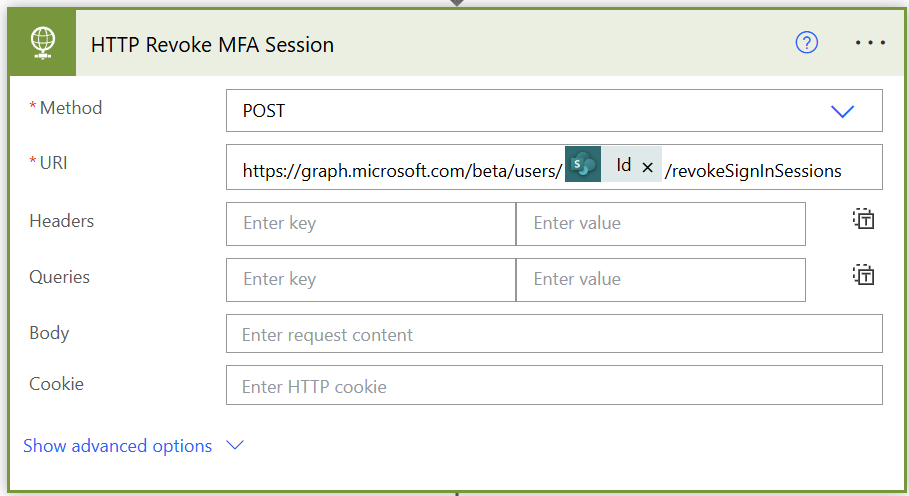
The above two steps disables the account and revokes any active MFA session.
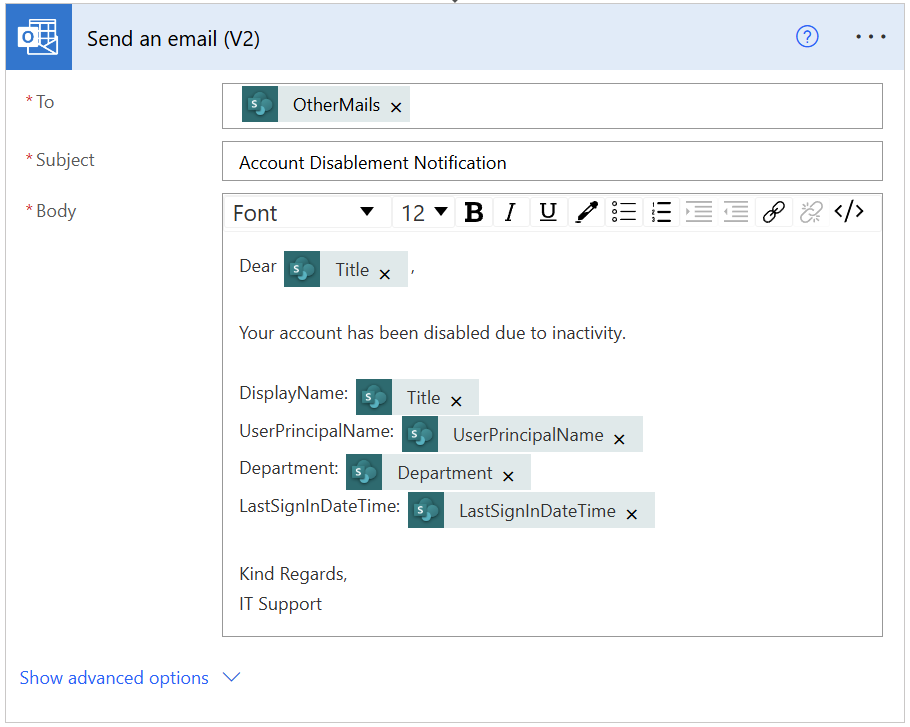
Add another action and look for “Send an email (V2)”. Select the OtherMails attribute for the “To”. Add a subject and body to the e-mail. Mine is really easy.
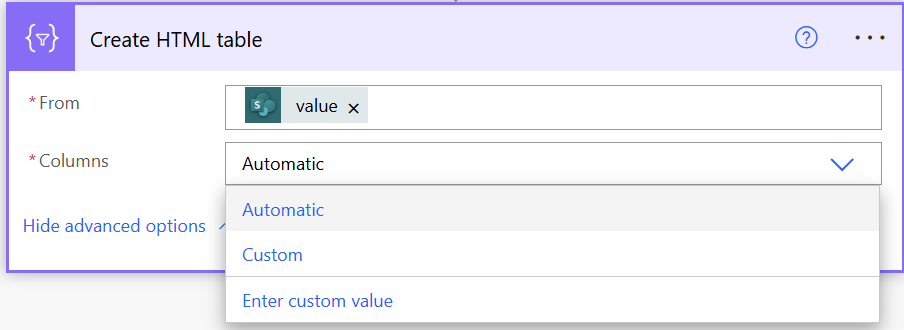
Press “New step” outside the “Apply to each” function and look for “Create HTML table”. In the “From” select the “value” from Get Inactive Users in the dynamic content section.

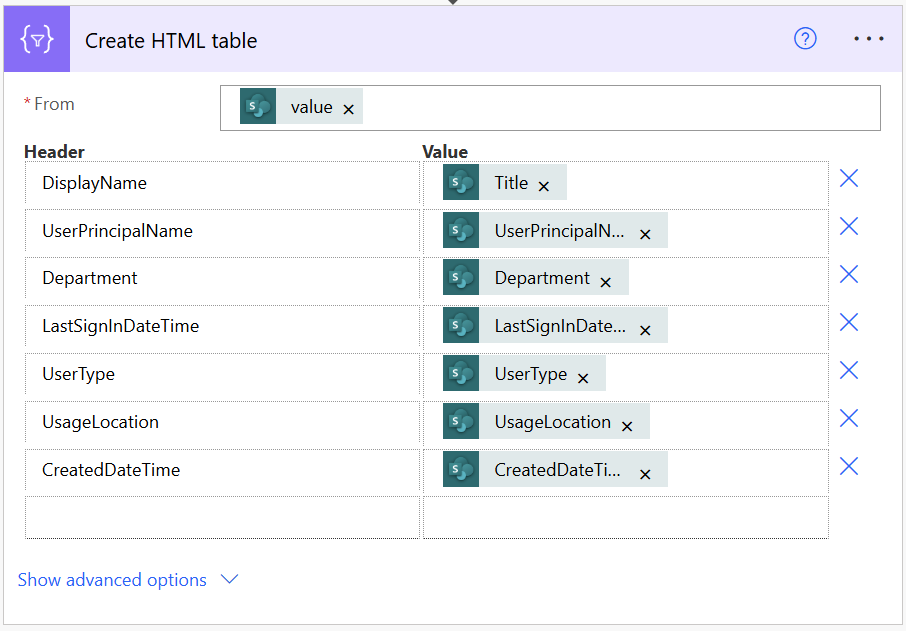
Press “Show advanced options” and change the column type from “Automatic” to “Custom”.
Add the following columns as shown in below screenshot.
Add a new “Compose” action and paste the below output in the “Inputs” field.
<style>
table {
border-collapse: collapse;
}
table td, table th {
border: 1px solid #AAAAAA;
padding: 3px 10px;
}
table tr:nth-child(even) {
background: #D9E1F2;
}
table thead {
background: #be2537;
}
table thead th {
font-size: 15px;
font-weight: bold;
color: #FFFFFF;
text-align: left;
}
table tfoot {
font-weight: bold;
}
</style>
@{body('Create_HTML_table')}
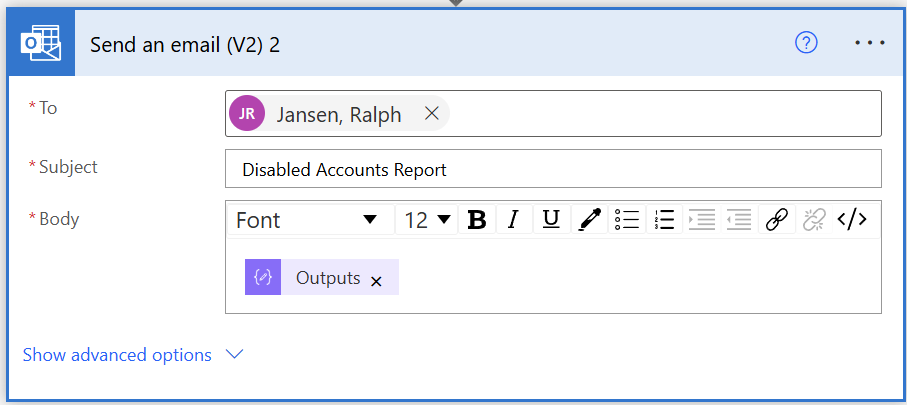
Add another “Send an email (V2)” action.
Select a To, Subject and add the “Outputs” from the last Compose action in your body.
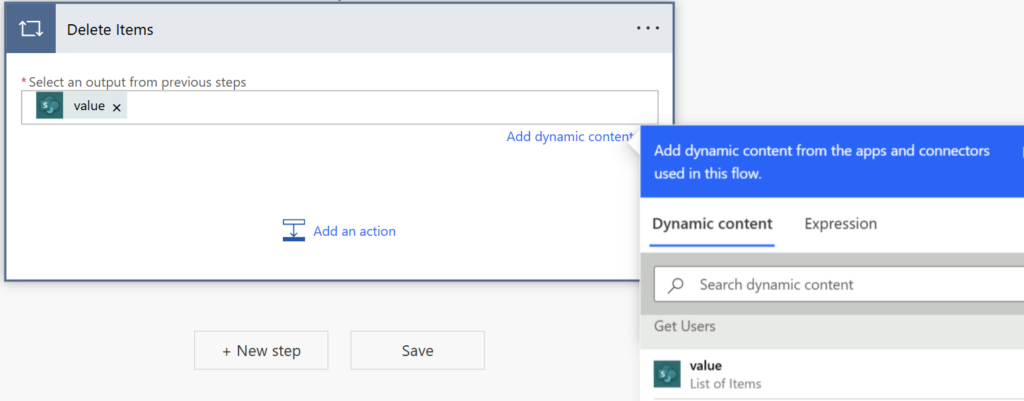
Now we’re at the last step. Add another “Apply to each” action and rename it to “Delete Items”.
Select “value” from the dynamic content and make sure it’s from “Get Users”.
Add a new action inside this function and look for “Delete Item” in SharePoint.
Enter the SharePoint site and list again. Select the ID from “Get Users” again.
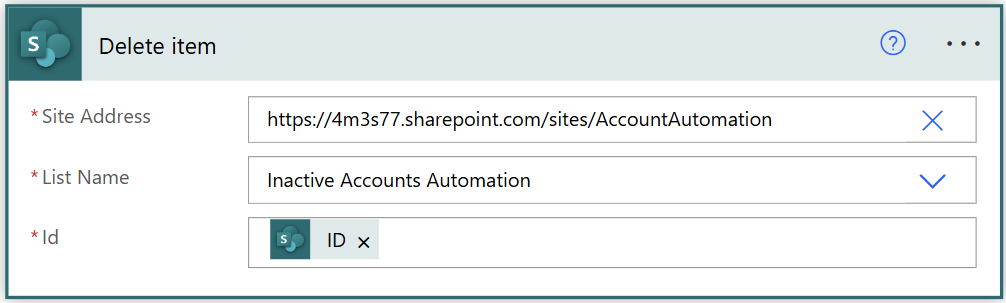
This makes sure that the content of the list is empty after the workflow has run successfully and the accounts have been disabled. If you don’t do this, there will be duplicates and users could get disabled even they have a recent sign in.
SharePoint List:
- Stores all accounts that ends with @authlink.nl in the user principal name.
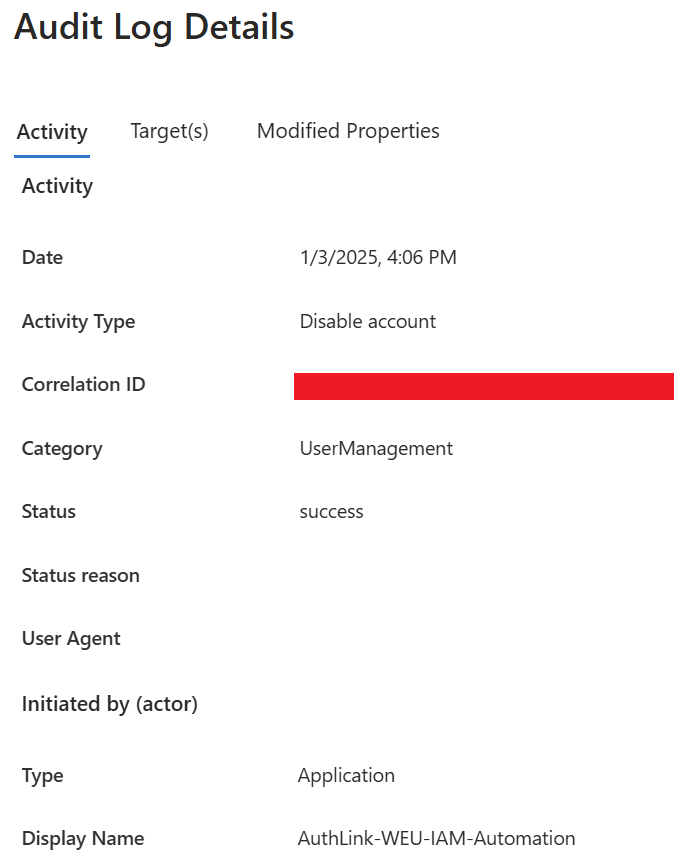
Audit Log in Entra ID:
- Audit log shows that the app registration has disabled the account.
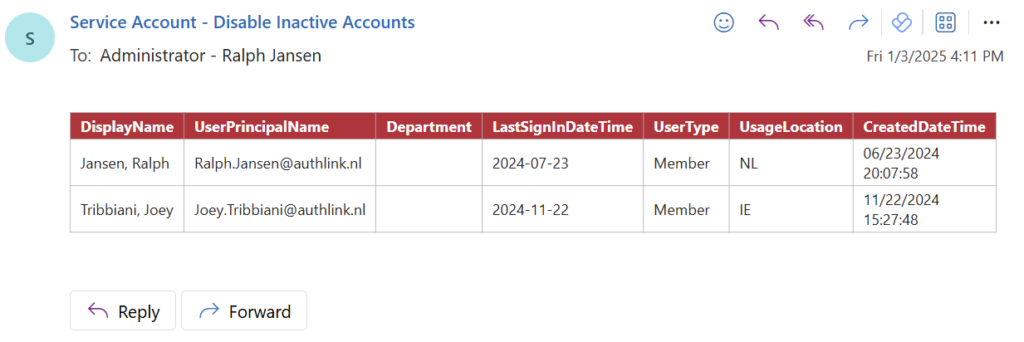
Report for Admin:
- List of accounts that have been disabled by the automation.
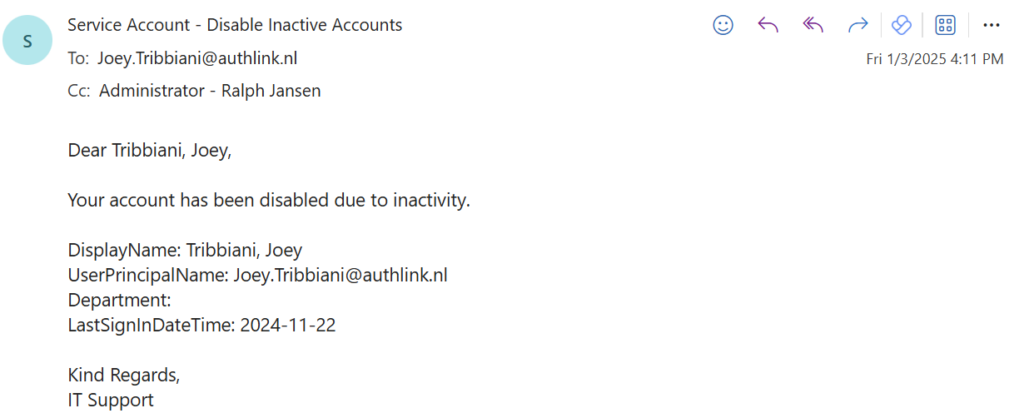
User Notification:
- Each user receives an e-mail that their account has been disabled due to inactivity.
That’s it! I hope you enjoyed this blog on how to automate the disablement of inactive accounts in Entra ID.
Cheers 😀