Welcome back everybody,
As I mentioned in part 1, I am going to show you how to retrieve the LAPS password from an Intune managed device through a Power Apps application. We make use of Power Apps (GUI), Power Automate (Workflow) and an application registration in Entra ID for the permissions to achieve this.
Requirements
- Microsoft Intune
- Microsoft Entra ID Free or higher license
- Entra ID Joined and Intune managed device
- Microsoft Power Automate Premium
- Microsoft Power Apps
Application registration
First, we start with creating a new application registration in Entra ID. The application registration is needed to read the LAPS attributes from the device(s).
- Go to Microsoft Entra admin center and sign in with your credentials
- Go to “Applications” –> “App registrations”
- Press “New registration”
- Give your application a name like “LAPS Portal App Registration”
- Configure the “Who can use this application or access this API?” for accounts in this organizational directory only
- Press “Register”
- Once the application is created, go to “API permissions”
- Press “Add a permission”
- Select “Microsoft Graph” –> “Application permissions”
- Assign the following two permissions:
- DeviceLocalCredential.Read.All
- DeviceLocalCredential.ReadBasic.All
- Press “Add permissions”
- Remove the “User.Read” permission
- Press “Grant admin consent”
Your application registration permissions should look like in the below screenshot.

Application secret
For development purposes to test the functionality of the Power App and Power Automate workflow, we can create a client secret to connect with the app registration. In production, you should avoid this and use a certificate instead. I will publish an article how you can use a certificate in near future.
- Go to Microsoft Entra admin center and sign in with your credentials
- Go to “Applications” –> “App registrations”
- Press “All applications”
- Look for the newly created app registration “LAPS Portal App Registration”
- Press “Certificate & secrets”
- Press “New client secret”
- Description: LAPSPortalSecret
- Expires: Recommended – 180 days (6 months)
- Copy the value and secret ID to somewhere safe. You need it later on
The secret is now generated and looks like below.

Service account creation
Now we have to create a manual service account in Entra ID. This service account will be used to host the Power App and to run the Power Automate workflow.
- Go to Microsoft Entra admin center and sign in with your credentials
- Go to “Users” –> “All users”
- Press “New user” –> “Create new user”
- User principal name: srv-LAPSApp
- Display name: Service Account – LAPS Application
- Password: Create a password or auto generate one (Save this as you require it later)
- Press “Next: Properties”
- Make sure you set the usage location. Otherwise, you cannot assign a license to the account
- Press “Next: Assingments”
- Don’t add anything here
- Press “Next: Review and create”
- Press “Create”
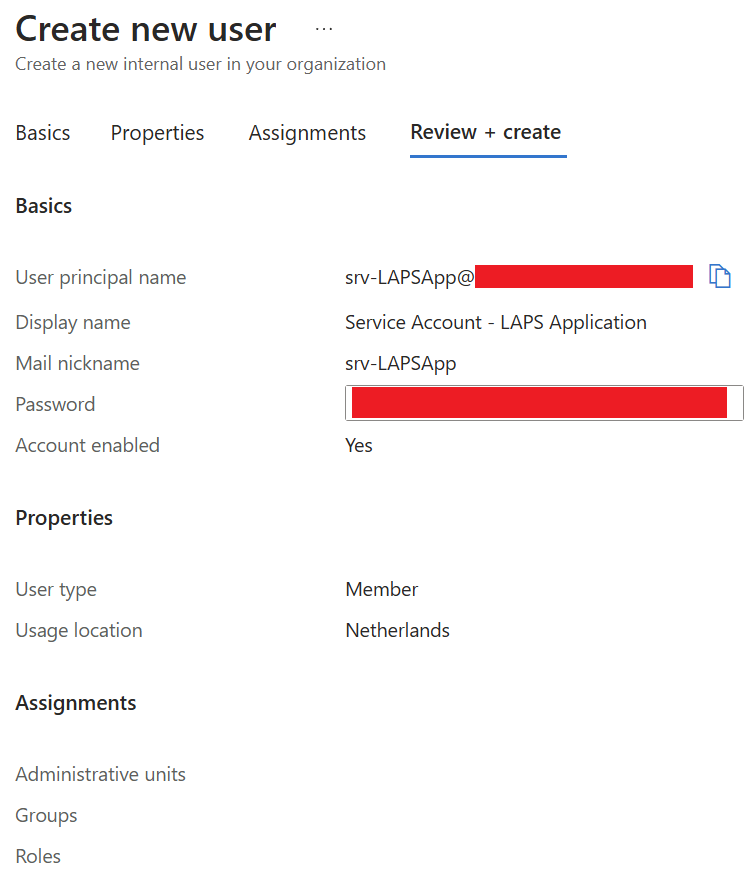
The account has been created. Now, we need to assign the license.
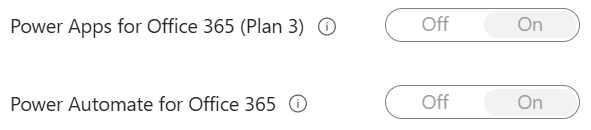
The Power Automate workflow we are going to create later in this article requires a premium connector. This connector can only be used whilst having a Microsoft Power Automate Premium license.
Next to this license, I am also assigning the licenses in the below screenshot.
Power Apps
- Go to Power Apps | Start and sign in with your newly created service account credentials
- Press “Apps” –> “New App” –> “Start with a page design” –> “Blank canvas”
Now you have successfully created your first Power App.
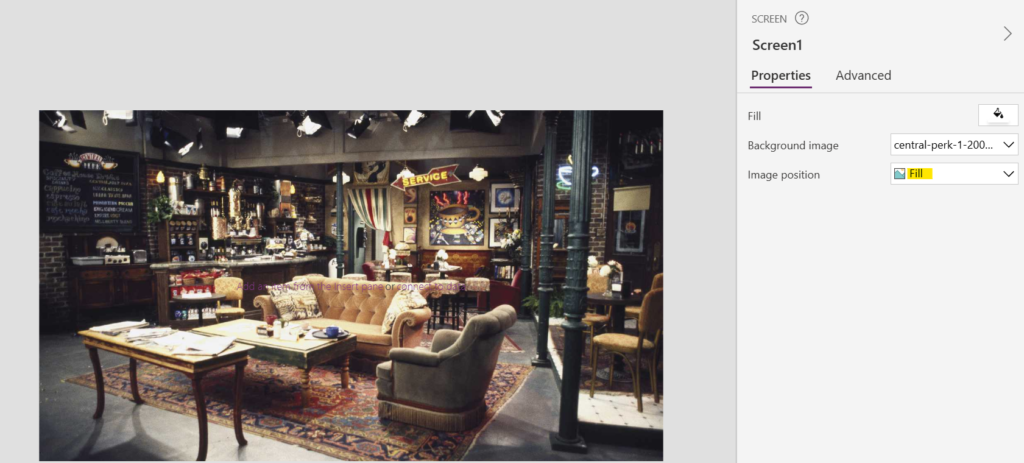
The first thing I will do now is add a background image to my canvas application. I am a big fan of the TV show “Friends” and therefore I have chosen to take Central Perk as background image.
Make sure you select “Fill”. The background image will cover the whole canvas app.
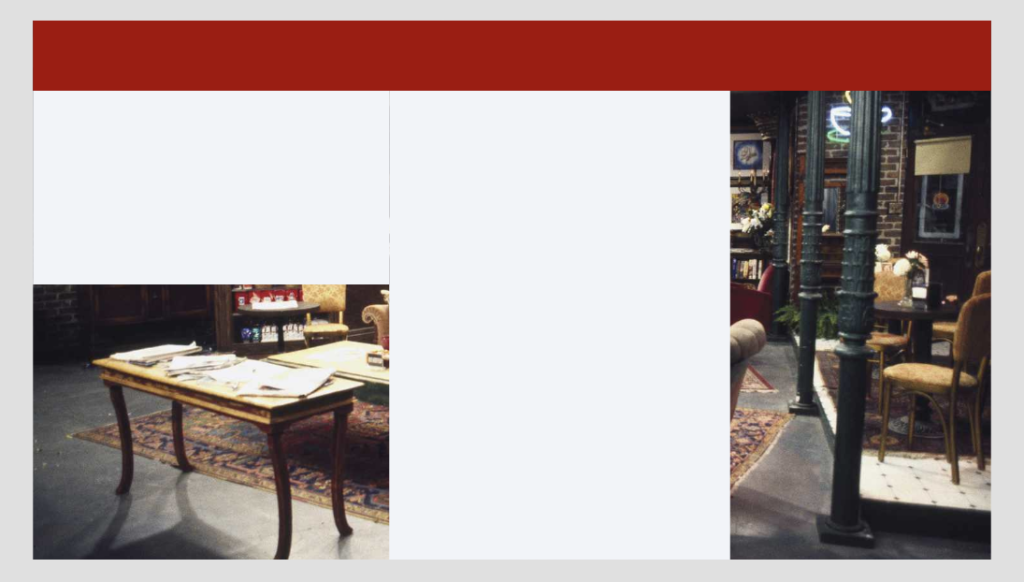
Now go to “Insert” and select the “Rectangle”. Select three of them and drag them like in the below screenshot. The red rectangle will be used to display the title of the canvas app. The other two rectangles will be used to display information about the requester and providing LAPS information about the device.
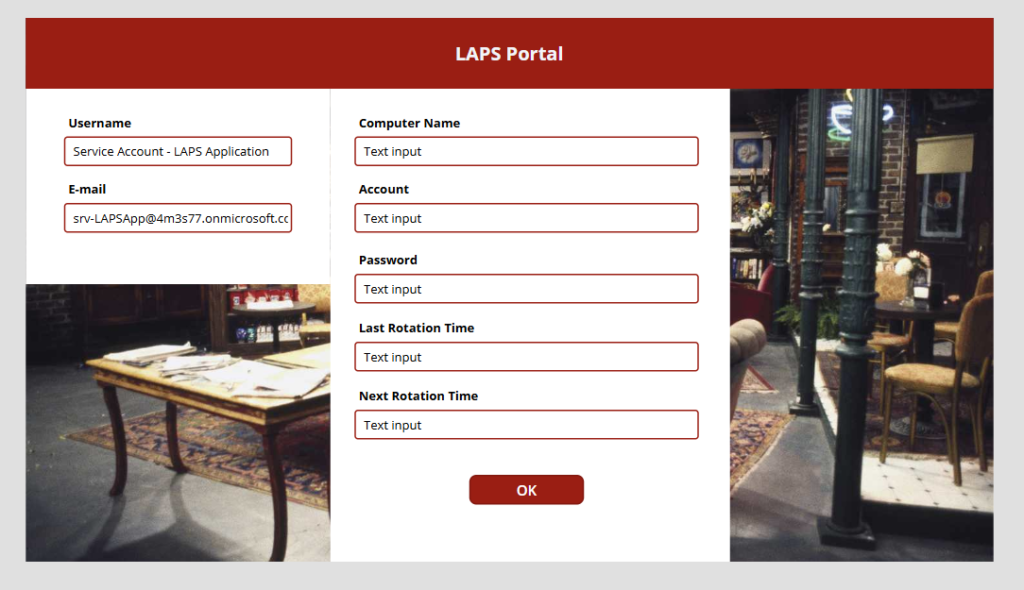
Now add a “Text label” and drag the label onto the red rectangle and give it a name. I will use “LAPS Portal”. Next, you need to add 7 “Text labels” and 7 “Text inputs”. Your canvas app will look like this now.
Add a “Button” and rename it to “OK”.
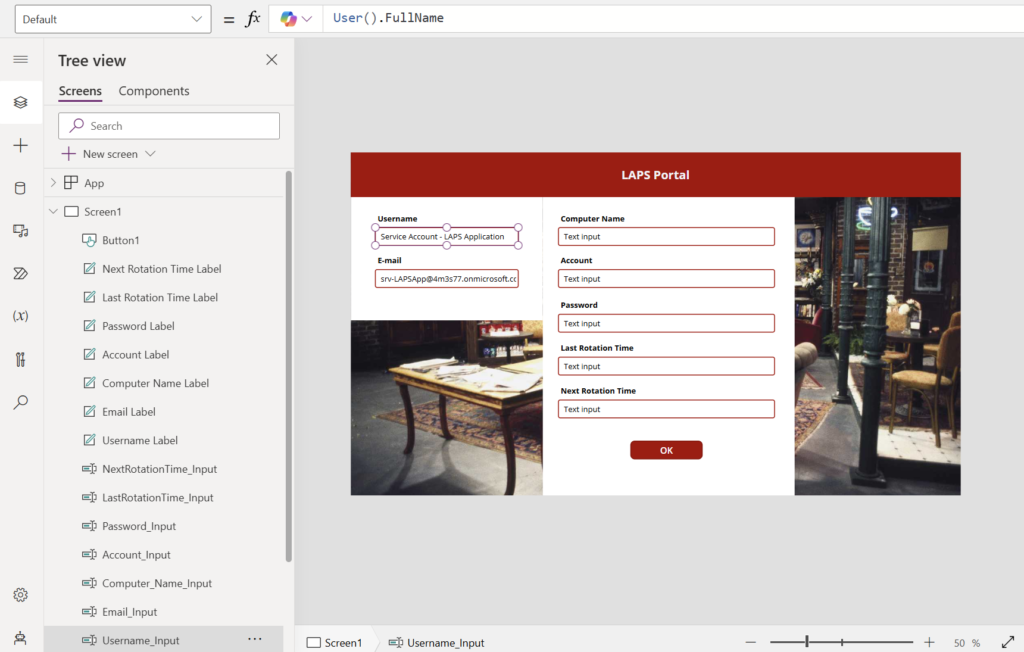
Go to the “Tree view” and give all your labels and boxes a logical name. You need logical names for later on when we connect the canvas app with the workflow. It should look like something in below screenshot.

Select the “Username input” box and change the Default from “Text Input” to “User().FullName”. You need to do the same step for “E-mail Input” and change it to “User().Email”.
The information of the engineer who’s going to use the Power app will be shown now.
Power Automate
Now things will a little bit mix up. The canvas app is not finished yet. However, we have to start on our workflow now in order to finish the canvas app.
- Go to Microsoft Power Automate | Home and sign in with your newly created service account credentials
- Press “Create” –> “Instant cloud flow” –> “When Power Apps calls a flow (V2)”.
- Give your workflow a name. I give mine the name “LAPS Workflow” and press “Create”.
The Power Automate workflow is created and it should look like this.
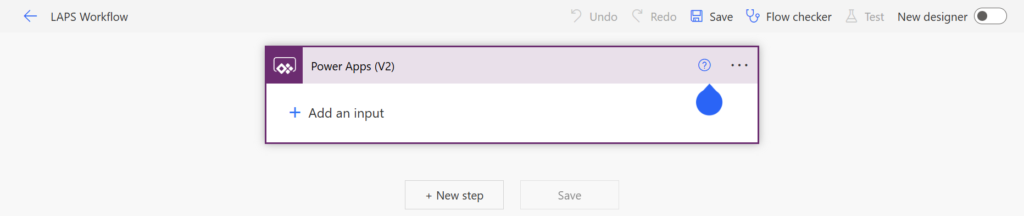
Press “Add an input” and make sure you add the following three:
- Input (Computer Name)
- E-mail (E-mail address)
- User (Username)

HTTP connector
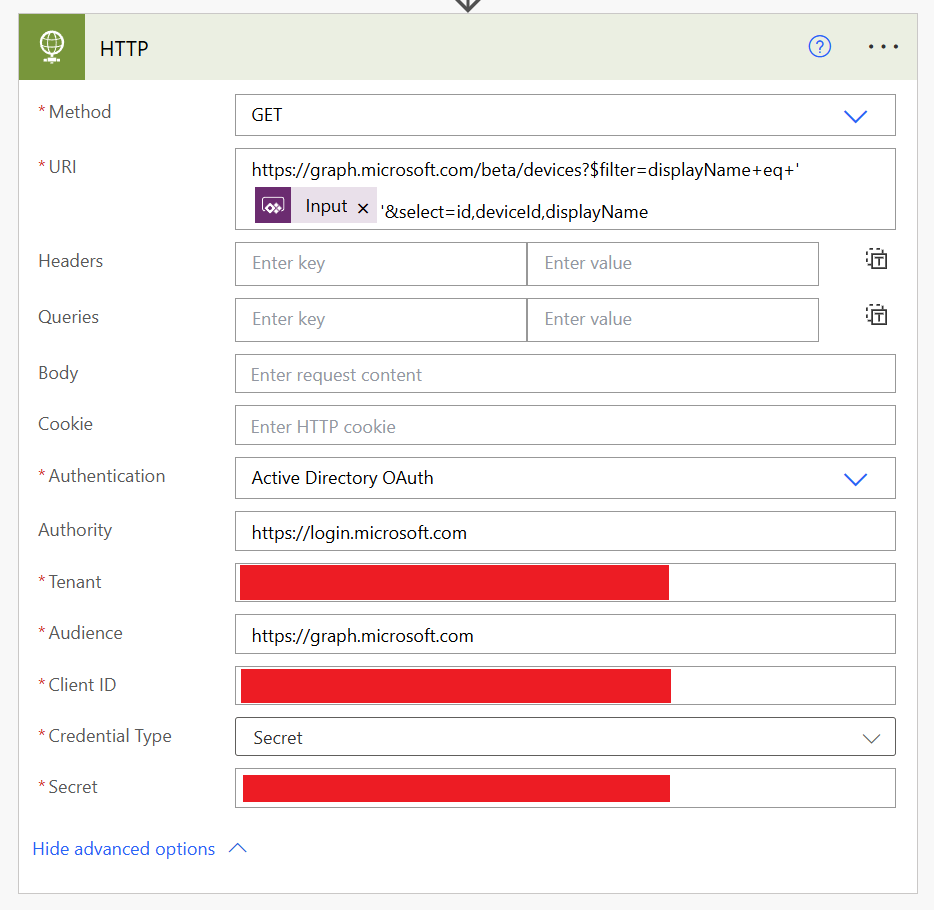
Press “New step” to add an action. We need the “HTTP” connector which is a premium connector. Therefore, as I mentioned earlier, you require a Power Automate Premium license.
Settings:
- Method: GET
- URI: https://graph.microsoft.com/beta/devices?$filter=displayName+eq+’@{triggerBody()[’text’]}’&select=id,deviceId,displayName
- Authentication: Active Directory OAuth
- Authority: https://login.microsoft.com
- Tenant: Enter your tenant ID. This can be found in the overview of Entra ID
- Audience: https://graph.microsoft.com
- Client ID: Enter the application (client ID) of the app registration. This can be found in the overview of the app registration
- Credential type: Secret
- Secret: Enter the value of the client secret you created earlier
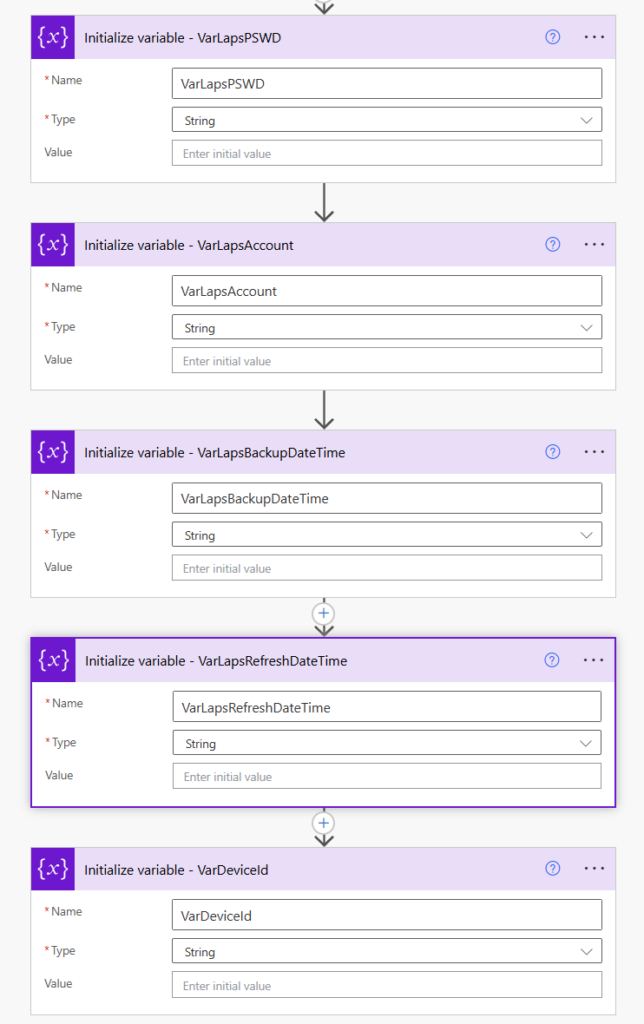
Add a new step and search for “Initialize variable”. You have to repeat this step 5 times:
- LAPS Password
- LAPS Account
- LAPS BackupDateTime
- LAPS RefreshDateTime
- DeviceId
Settings:
- Name: VARLapsPSWD, VarLapsAccount, VarLapsBackUpDateTime, VarLapsRefreshDateTime, VarDeviceId
- Type: String
- Value: N/A
Your variables should look like shown in below screenshot. Make sure you also rename the actions.
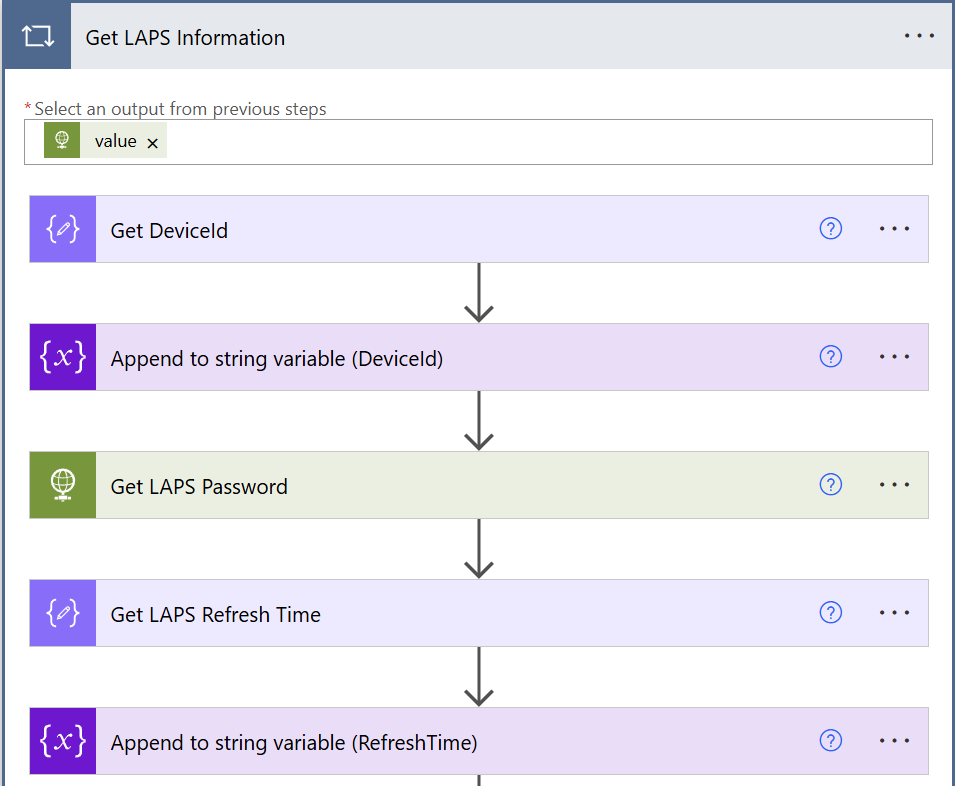
- Add another step. Look in the “Actions” tab for “Control” and then “Apply to each“.
- Rename the apply to each action to “Get LAPS Information“
- Add the following expression: body(‘HTTP’)?[‘value’]
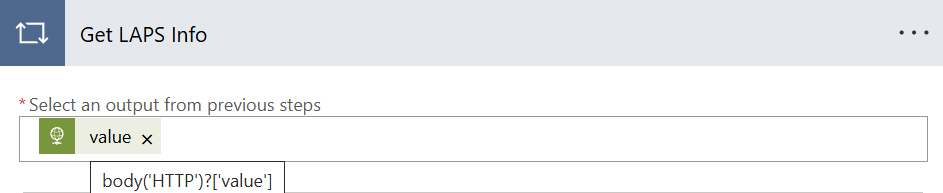
- Inside the “Get LAPS Information” press “Add an action” and look for “Compose”.
- Rename this action to “Get DeviceId”.
- Add the following expression: items(‘Get_LAPS_Information’)?[‘deviceId’]

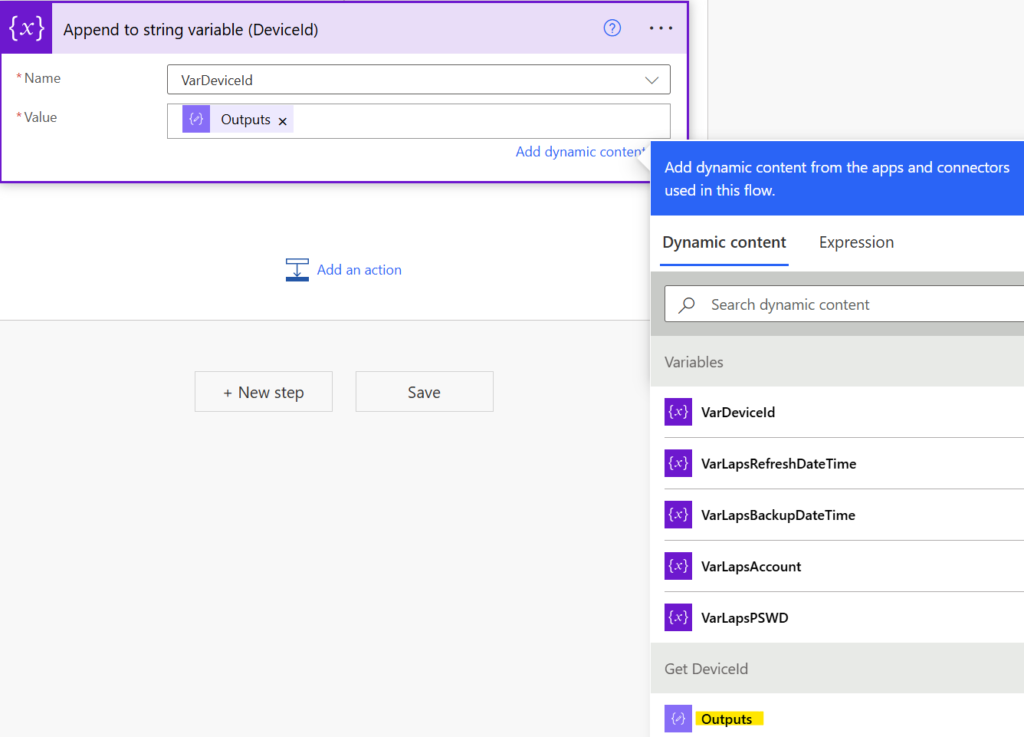
- Add a new step and look for “Append to string variable“.
- Select the VarDeviceId from the dropdown list in the Name field. Select “Outputs” from “Get DeviceId” in the Dynamic content section.
- Rename your action to “Append to string variable (DeviceId)“.
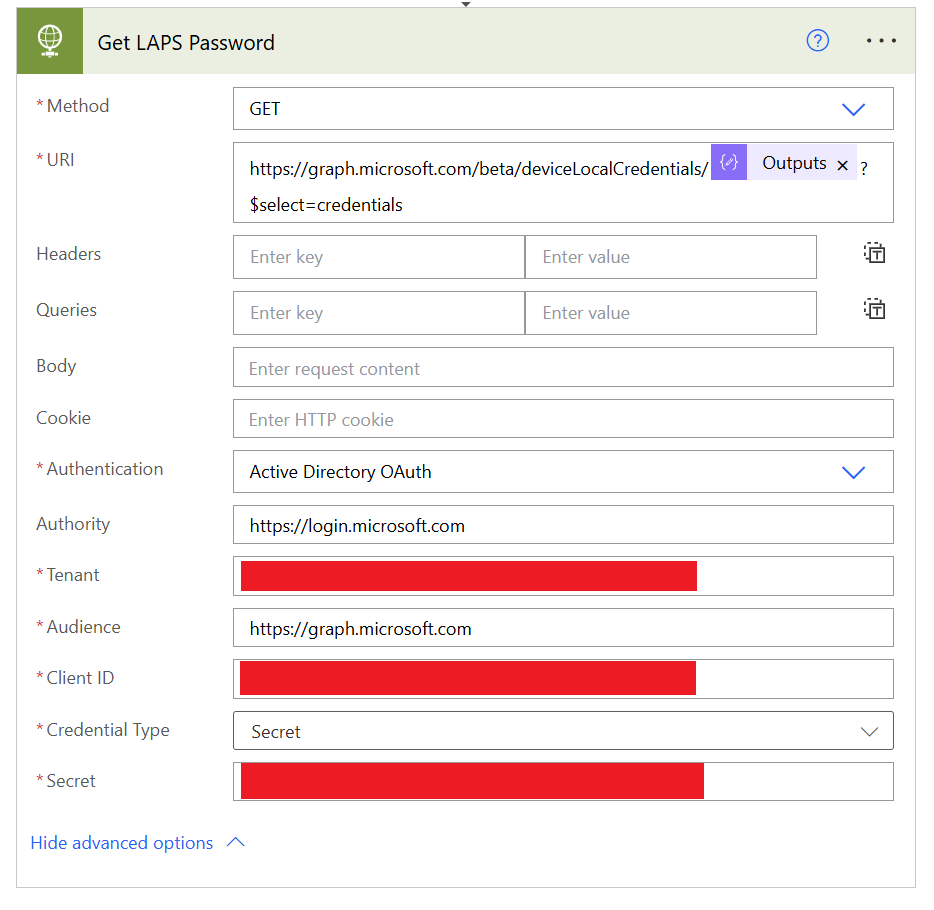
- Add a new step and look for “HTTP” again.
Now the only thing that needs to be changed is the URI. This is needed to retrieve the LAPS information from the device you will enter in the Power App soon.
URI: https://graph.microsoft.com/beta/deviceLocalCredentials/@{outputs(‘Get_DeviceId’)}?$select=credentials
- Rename your action to “Get LAPS Password“.
- Add another step and look for “Compose” again.
- Add the following expression: body(‘Get_LAPS_Password’)?[‘refreshDateTime’]
- Rename your action to “Get LAPS Refresh Time“.

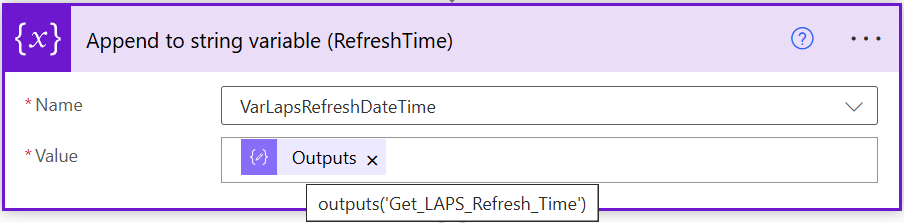
- Add another step and look for “Append to string variable” again.
- Select the VarLapsRefreshTime from the dropdown list in the Name field. Select “Outputs” from “Get LAPS Refresh Time” in the Dynamic content section.
- Rename your action to “Append to string variable (RefreshTime)“.
Your “Get LAPS Information” action should look like in the below screenshot.
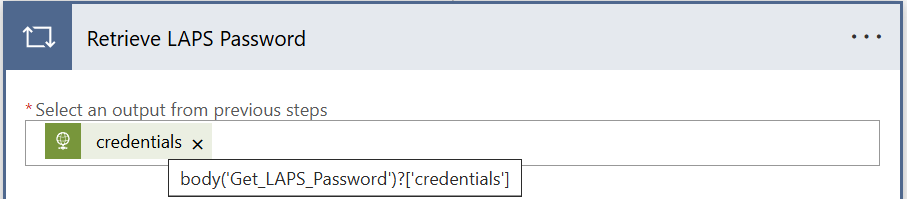
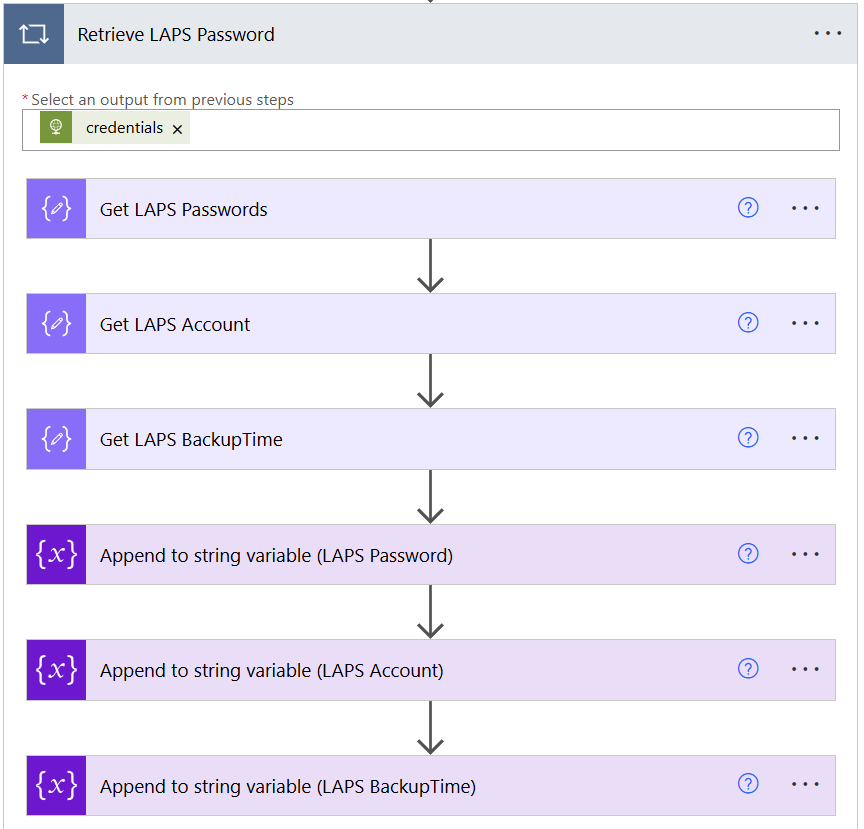
- Inside the “Get LAPS Information” add another step. Look in the “Actions” tab for “Control” and then “Apply to each“.
- Rename the apply to each action to “Retrieve LAPS Password“
- Add the following expression: body(‘Get_LAPS_Password’)?[‘credentials’]
- Inside the “Retrieve LAPS Password” add another step “Compose“.
- Rename your action to “Get LAPS Passwords“.
- Add the following expression: base64ToString(item()?[‘passwordBase64’])

Repeat this step two more times for retrieving the LAPS account name and the LAPS backup date time.
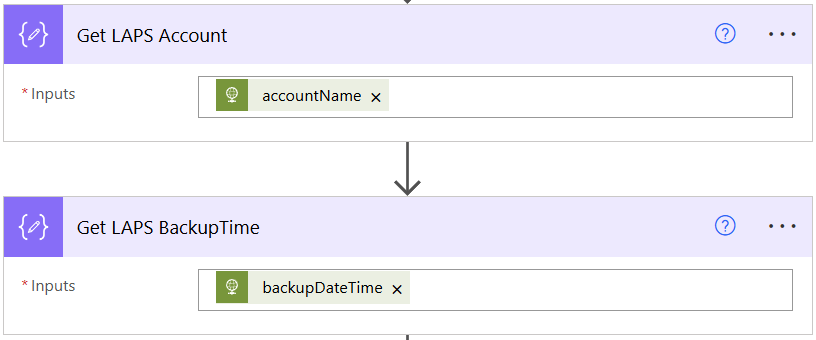
- Add another “Compose” step.
- Rename your action to “Get LAPS Account“.
- Add the following expression: items(‘Retrieve_LAPS_Password’)?[‘accountName’]
- Add the last “Compose” step.
- Rename your action to “Get LAPS BackupTime“.
- Add the following expression: items(‘Retrieve_LAPS_Password’)?[‘backupDateTime’]
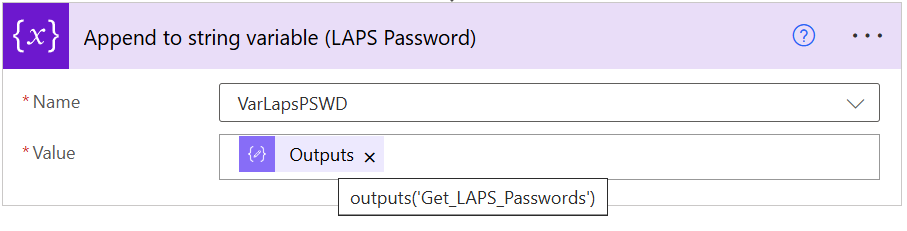
Add three “Append string to variable” steps now.
- Select the VarLapsPSWD from the dropdown list in the Name field. Select “Outputs” from “Get LAPS Passwords” in the Dynamic content section.
- Rename your action to “Append to string variable (LAPS Password)“.
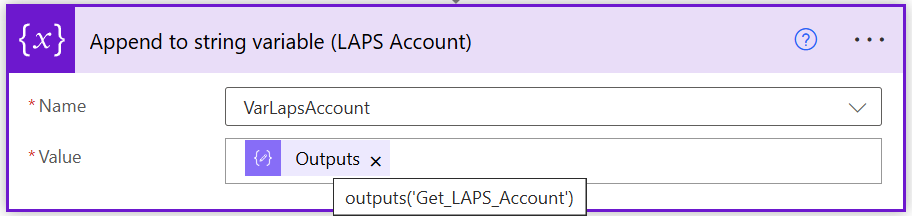
- Select the VarLapsAccount from the dropdown list in the Name field. Select “Outputs” from “Get LAPS Account” in the Dynamic content section.
- Rename your action to “Append to string variable (LAPS Account)“.
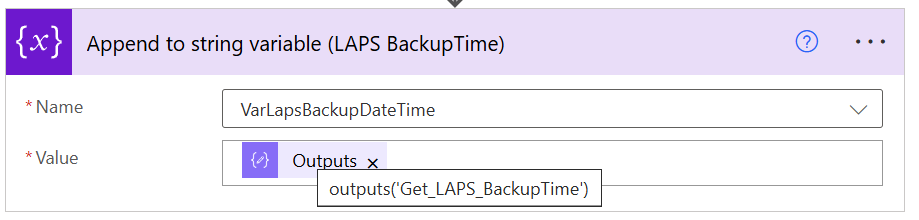
- Select the VarLapsBackupDateTime from the dropdown list in the Name field. Select “Outputs” from “Get LAPS BackupTime” in the Dynamic content section.
- Rename your action to “Append to string variable (LAPS BackupTime)“.
Your “Retrieve LAPS Password” action should look like in the screenshot.
- Close the action “Retrieve LAPS Password” and after that also close the action “Get LAPS Information” action.
- Press “New step“.
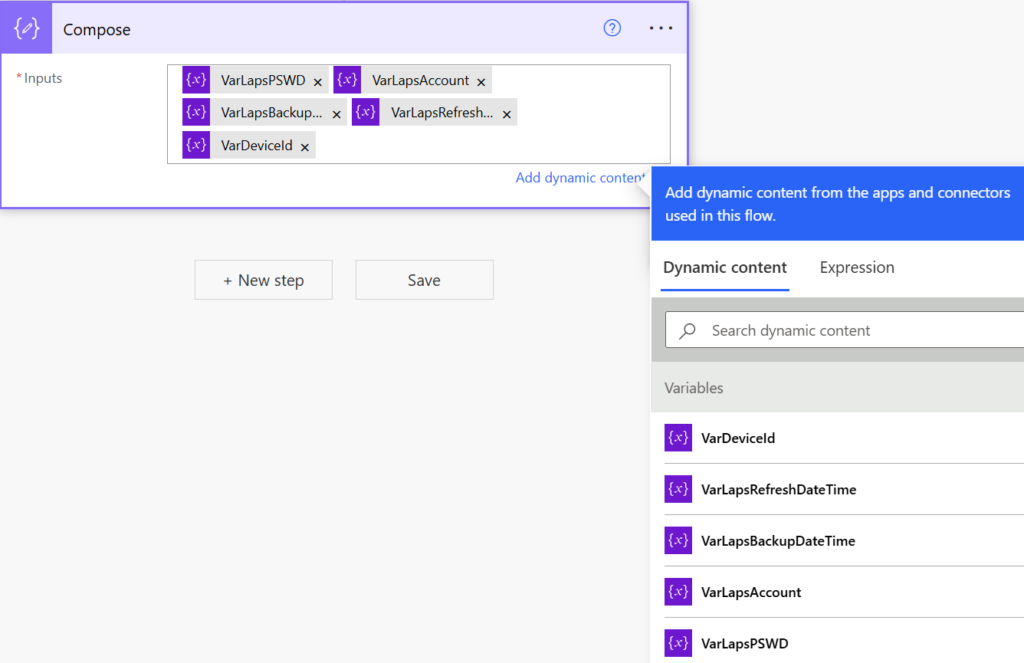
- Add “Compose“.
- Add all variables from the dynamic content menu.
- Add another step and look for “Respond to a Power App or flow“.
- Add four outputs:
- Text: Password
- Value: substring(variables(‘VarLAPSPswd’),0,14)
- Text: AccountName
- Value: substring(variables(‘VarLapsAccount’),0,11)
- Text: BackupTime
- Value: substring(variables(‘VarLapsBackupDateTime’),0,10)
- Text: RefreshTime
- Value: substring(variables(‘VarLapsRefreshDateTime’),0,10)
The action should look like in below screenshot.

Power App
Back to the Power App now. The Power Automate workflow is completed.
In the menu of the canvas app you have created earlier look for “Power Automate”.
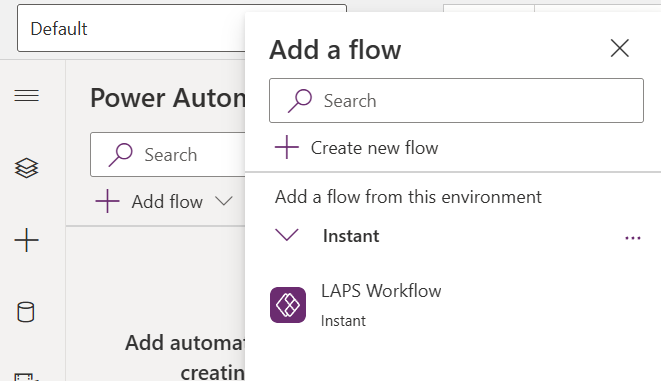
- Press “Add flow”.
- Select the “LAPS Workflow”
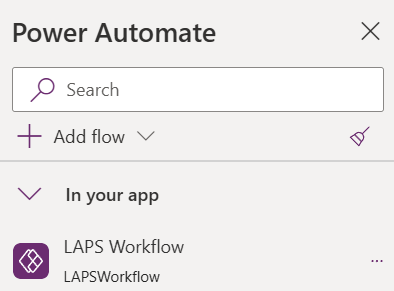
The Power Automate workflow is successfully connected now.
- Press the “OK” button in the canvas app and make sure “OnSelect” is selected in the top.
- Add the following command into the “OnSelect“: Set(GetLAPS, LAPSWorkflow.Run(Computer_Name_Input.Text,Email_Input.Text,Account_Input.Text));
Set(shouldReset,true); - Select the “Text input” for “Account” and add the command:

- Change the Default for each input box (Computer Name, Account, Password, Last Rotation Time and Next Rotation Time) to this:
- Account: GetLAPS.accountname
- Password: GetLAPS.password
- Last Rotation Time: GetLAPS.backuptime
- Next Rotation Time: GetLAPS.refreshtime
- Change the Hint Text for each input box (Computer Name, Account, Password, Last Rotation Time and Next Rotation Time) to something like:
- Computer Name: Enter computer name here…
- Account: Account name is displayed here…
- Password: Password is displayed here…
- Last Rotation Time: Last rotation time is displayed here…
- Next Rotation Time: Next rotation time is displayed here…
The Power app should look like shown in below screenshot.

Testing
We are ready to test our application now.
As you can see in the video, I was able to successfully retrieve the LAPS password for this device.
To make sure it is the correct password, I have checked from Intune if the information is correct. In the below screenshot you can see that the same attributes are displayed 🙂

That’s it! At least for now. Stay tuned for part 3 where I will explain how you can built an audit log for every engineer who requested a LAPS password.
Cheers! 😀